


Written by: J.A. Iris (DesViper)
Welcome back to Candlekeep Mysteries! This post covers the second half of Candlekeep; you can find the first half in Part 1.
Below is a list of maps that would be a great addition to the last 8 adventures of Candlekeep Mysteries, from Kandlekeep Dekonstruction by Amy Vorpahl to Xanthoria by Toni Winslow-Brill!
Spoiler warning: spoilers for adventures in Candlekeep Mysteries ahead, proceed with caution!
Kandlekeep Dekonstruktion
1. Mountaintop Observatory - Interior First Floor
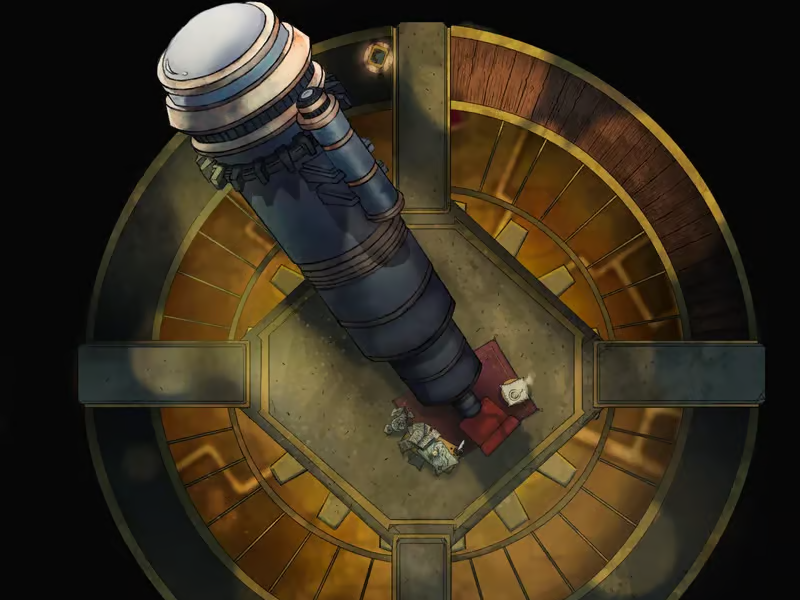
Kandlekeep Dekonstruktion is a curious tome detailing a forgotten wing of Candlekeep; one inexplicably outfitted with a number of strange devices that would convert the tower into a rocket ship! Once the player characters try to inquire more about this strange wing, the ground shudders to notify them that someone is well on their way to implementing these conversion plans!
As the 60-minute launch sequence proceeds, the player characters search, fight, and knock their way through the makeshift rocket tower, eventually reaching the cult leader in the observatory-turned-control room. The Mountaintop Observatory’s interior is practically custom-made for this adventure! The controls on the ground floor and a telescope above make a perfect arena for the showdown with the know-it-all cultists.
Honourable mention: if our heroes fail to stop the launch, The Crystal Veil could serve as the set piece for a campaign taking place in outer space above Candlekeep!
Zikran’s Zephyrean Tome
2. Ruined Courtyard - Glowy Crystal
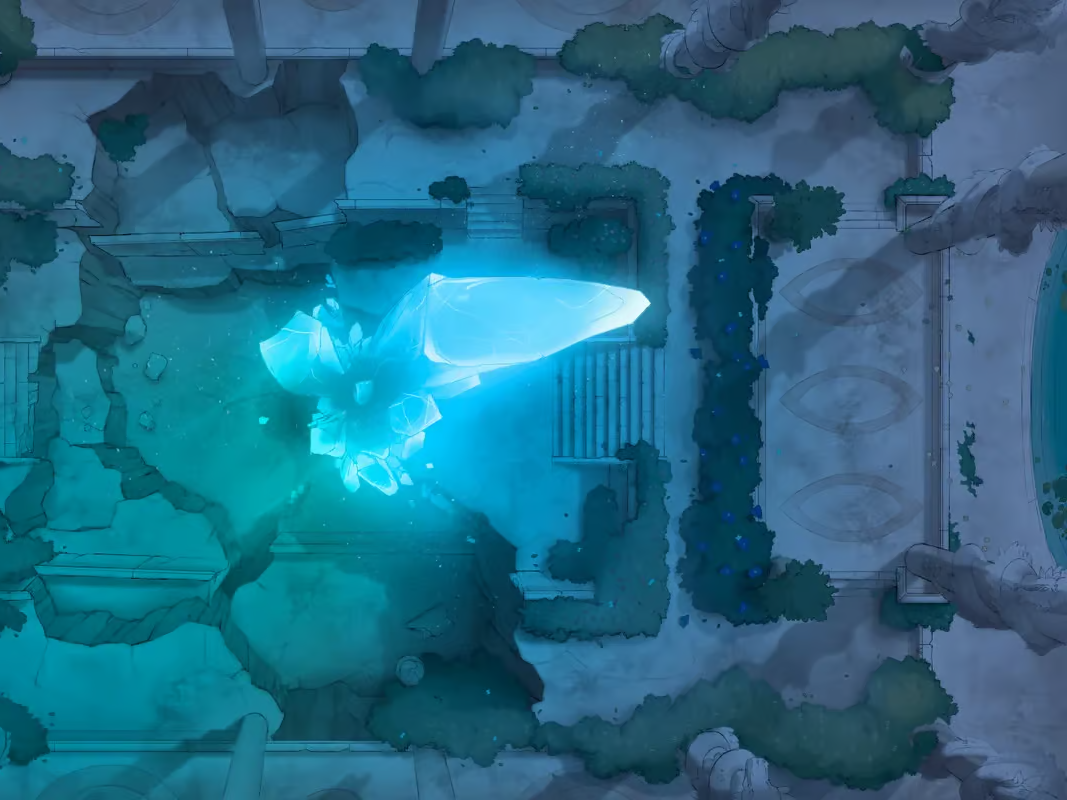
The next adventure in Candlekeep has one of the most typical-yet-iconic adventure hooks: a locked spellbook! Within Zikran’s Zephyrean Tome is an unexpected ally, a djinn subjugated by our villain! With the djinn’s help, our heroes travel through an abandoned wizard’s lab, a bronze dragon’s lair, and a haunted giant’s temple before arriving at his magnum opus, a massive elemental cannon!
Cannon in tow, the heroes could face off in the Ruined Courtyard, featuring a massive, glowing crystal to power Zikran’s cannon. And when he’s defeated, a djinni’s wish awaits them!
The Curious Tale of Wisteria Vale
3. Grand Hunter's House
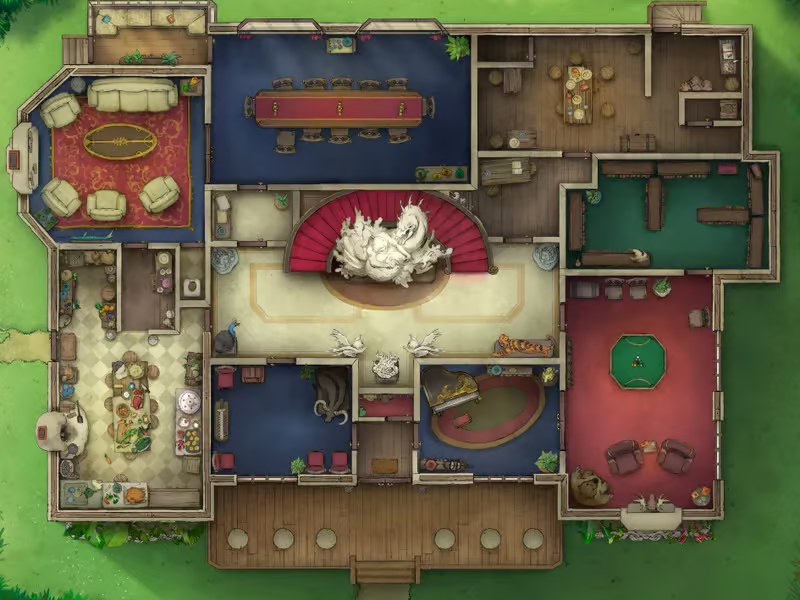
The Curious Tale of Wisteria Vale tells the story of Harper folk hero Arrant Quill, a bard forged in the fires of vengeance that eventually consumed him in a crusade against “evil”. So, unable to save him from himself, the Harpers imprisoned him in the tale based on his life. Whether led by the Harpers or by fate, the player characters find themselves transported to Wisteria Vale to cure Arrant’s all-consuming vengeance.
There, wooden villagers guide the player characters to the real danger to Wisteria Vale, a beholder that has taken over Quill’s manor! The Grand Hunter’s House is a great fit for a manor for a legendary bard, including a kitchen, lounge, study, and, of course, secret passages and hidden rooms. Exploring the house thoroughly, they eventually find Arrant Quill and release him from his prison, only to find themselves facing the beholder that imprisoned him!
4. Prismatic Ballroom - Spotlight

Before they can celebrate with Quill, the player characters are thrust into a grand ball hosted by a false Quill and the beholder orchestrating it. The Prismatic Ballroom captures the glamour of (false) Quill’s ball, especially with the spotlight on him as the wooden villagers escape into the darkness. You could even convince Quill to dramatically cure himself in said spotlight, unravelling Wisteria Vale as you return to Candlekeep safe and sound.
The Book of Inner Alchemy
While Candlekeep is proud to grant admittance to anyone willing to contribute to its seemingly endless libraries, there are still some books deemed too dangerous to allow unrestricted access. One such work is The Book of Inner Alchemy, an esoteric treatise delving into the depths of ki, the life energy that fuels monks’ extraordinary abilities. Despite the authors’ and Candlekeep’s efforts to keep this book away from those with ill intent, a group of renegade monks known as the Order of the Immortal Lotus had infiltrated Candlekeep and stolen pages from Inner Alchemy. So, our heroes are sent into the nearby Cloakwood to retrieve the pages and stop these villains before they can repeat the mistakes of the book’s authors!
5. Zen Monastery

Once the player characters pass through the Cloakwood, they arrive at the Order’s temple and meet one of its fiercest members, Steel Crane! The Zen Monastery sets an idyllic scene to confront the Order and gives the monks an advantage: they can run straight across the water to greet the player characters just long enough to shove them into said water! Then, after drying off, they can pass through the rest of the picturesque, hidden temple.
6. Secret Fey Fountain - Cave

Through the Garden, beyond the Hall of Knowledge, and within the Jagged Sanctum stands the order’s leader, Bak Mei, ready to introduce the player characters to his infamous Immortal Lotus Style. Leaping from his lotus-shaped throne of the Secret Fey Fountain Cave, he charges the players with the power of body, mind, and soul. But if this doesn’t achieve victory, he will surrender the pages to the player characters. They are then left to decide the fate of the Immortal Lotus themselves….
The Canopic Being
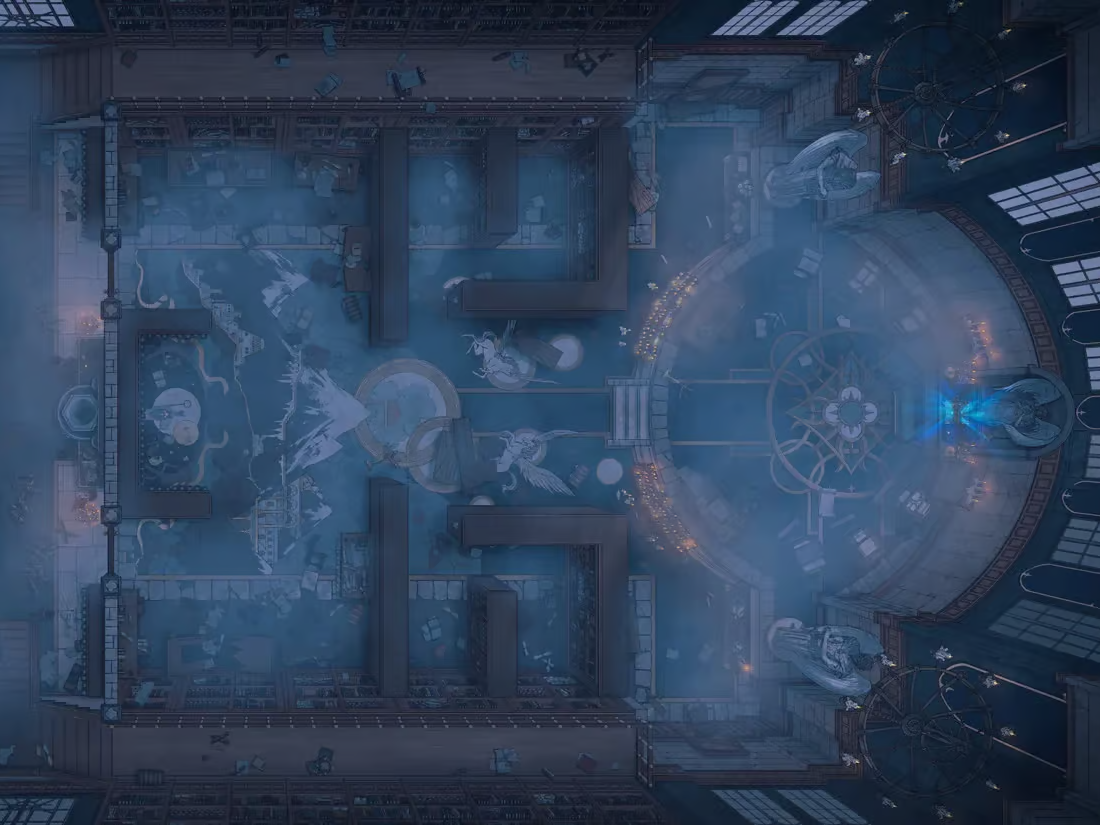
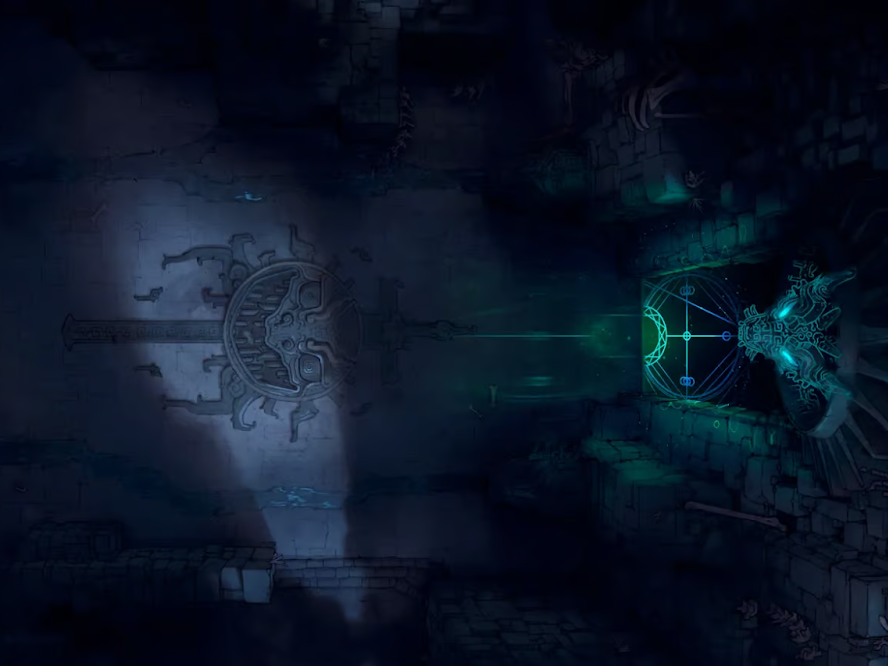
7. Magical Tournament Arena - Astral Plane

The Canopic Being is, at first glance, yet another book of dark rituals and forbidden magic, but a Great Reader of Candlekeep summons the player characters to inspect it anyway. Within, they find a list of “Willing Sacrifices” and are shocked to see their own names among them! The Great Reader then sends the player characters to the far-off land of Tashalar to consult the oracles that the Canopic Being was last used by. There, they breach into the tomb-temple of the mummy lord oracle Valin Sarnaster.
Traversing the dungeon of her tomb and past her sarcophagus, our heroes arrive at the Observatory of Fate, which quickly becomes a Magical Tournament Arena as Valin challenges them to fulfill their destinies as she had foreseen. They battle among an audience of floating magical eyes, hearing their fates and secrets revealed by the mummy oracle, but if they were thorough in their dungeon-delving, they defeat Valin and seal her own fate as a false demigod soothsayer!
The Scrivener’s Tale
8. Celestial Chapel Interior - Fog
As dedicated and meticulous as the Avowed are, clerical errors do occasionally occur, usually not leading to disaster. Unfortunately for our heroes, The Scrivener’s Tale makes its way to their latest stack of books from Candlekeep. After reading even a paragraph of it, they are cursed with an unseelie mark that threatens to petrify them in glass if they don’t resolve some ancient business of the Gloaming Court of the Feywild.
Stalked by the Court’s pawns, they travel through Baldur’s Gate, an unassuming faraway village, and ruins of a lost kingdom within to find a deep library called the Haven of the Red Quill. There, the archfey cursing them is released and immediately attacks. The Celestial Chapel Interior - Fog captures the unsettling ruined arena where our heroes battle the primeval fey. And, when they defeat the fey princess and end the curse, a trove of lost knowledge is theirs for the taking!
Alkazaar’s Appendix
9. Dracolich Lair - Sealed Entrance
Alkazaar’s Thrilling Tales is a memoir of the famous sand-dusted explorer’s many escapades. Its companion, Alkazaar’s Appendix, however, begins this adventure. It tells of one last expedition before retirement: in the Netherese deserts beyond the Sword Coast, Alkazaar found a loyal golem of an ancient and adored Netherese prince. But alas, a sandstorm ward scuttled his expedition, so he was forced to retire, leaving this golem abandoned in the desert.
Using a portal at the end of the Appendix, the player characters make their way to a necropolis housing the prince’s dormant body, but as they enter, they find a cruel dracolich guarding the inner chambers. The Dracolich Lair - Sealed Entrance map fits this adventure to the tee, an ideal place to battle the desert dracolich hungry for the lost kingdom’s magic.
Honourable mention: the Necropolis Dungeon fits the remainder of the dungeon perfectly, and its Grand Tomb is an ideal setpiece to bring the Netherese prince to rest.
Xanthoria
10. Mycelial Gate - Spore Swarm
A dread plague ravages the Sword Coast, driving our heroes to the depths of Candlekeep in search of a cure. There, they find an untitled book called “Xanthoria” and their first lead on this fungal plague. The book begins as a naturalist’s essays on symbiotic life but quickly descends into incoherence attributable only to demonic influence. This influence is just enough of a clue to lead the adventurers to a vast fungal cave system called the Lykothra Expanse.
Journeying there, they meet a kind but somber sprite who leads them to the cause of this plague, the lichen lich Xanthoria and her terrible experiments on symbiosis. The Mycelial Gate - Spore Storm makes an excellent lair for the lich with close-quarters and a life-drained atmosphere. There our heroes can defeat the lich and her plague once and for all!
We hope you enjoyed this two-part series on Candlekeep Mysteries. For more deep dives into Dungeons and Dragons adventures, check out the rest of our blog!
Start Your Adventure With a FREE Asset Pack!
Keep up to date with the latest from Czepeku, sign up to our mailing list now and receive an introductory goodie bag of fantasy and sci-fi maps, scene, and tokens.