


A UVTT (Universal Virtual Tabletop) file packages a map’s image together with its wall, lighting, and grid data.
When you import one into a virtual tabletop that supports UVTT files, all of these features come along for the ride, meaning you won’t have to spend time manually tracing the walls and placing light sources.
UVTT files are included with every Czepeku map and available to Premium subscribers, ready to import into Owlbear Rodeo.
How to use UVTT files with Owlbear Rodeo
Step 1: Download the UVTT file
Before you get started, make sure you have your UVTT file ready. For Czepeku maps, here’s how it works:
- On the map’s gallery page, find the variation you want to use.
- Click the round download icon next to the map image.
- Select Owlbear Rodeo from the list of VTT options.

Step 2: Install the Smoke and Spectre extension
Install the Smoke & Spectre extension on your Owlbear Rodeo account. This is an extension that handles UVTT imports, dynamic vision, and more.
Step 3: Create a new scene
- In Owlbear Rodeo, create a new Room.
- Once it’s live, click the glasses icon in the top left to open the Smoke & Spectre panel.
Step 4: Import the UVTT file
- In the Smoke & Spectre panel, open the Settings tab.
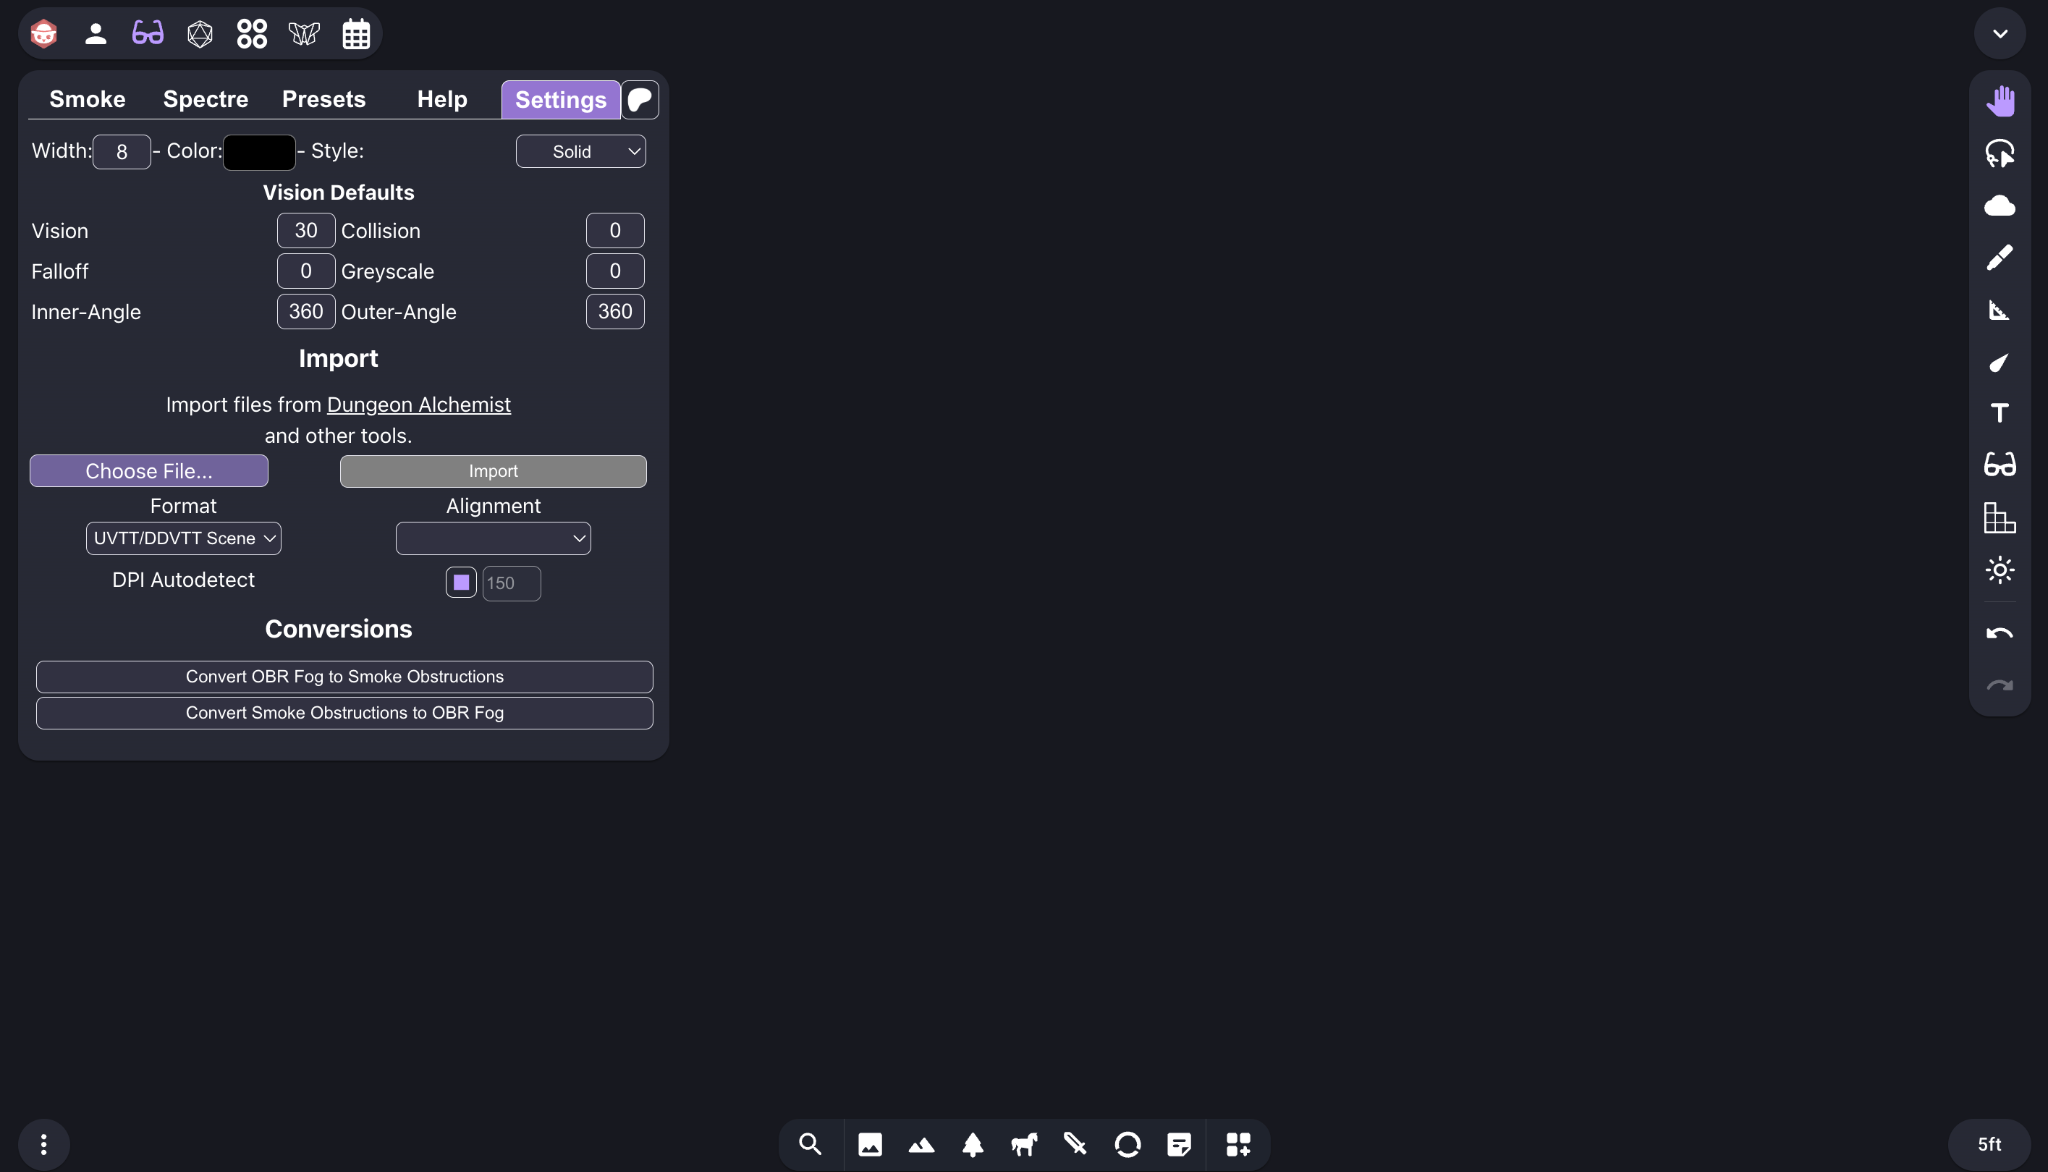
- Choose the UVTT file from your computer with “Choose File”, then click Import.
Step 5: Enable dynamic vision on your tokens
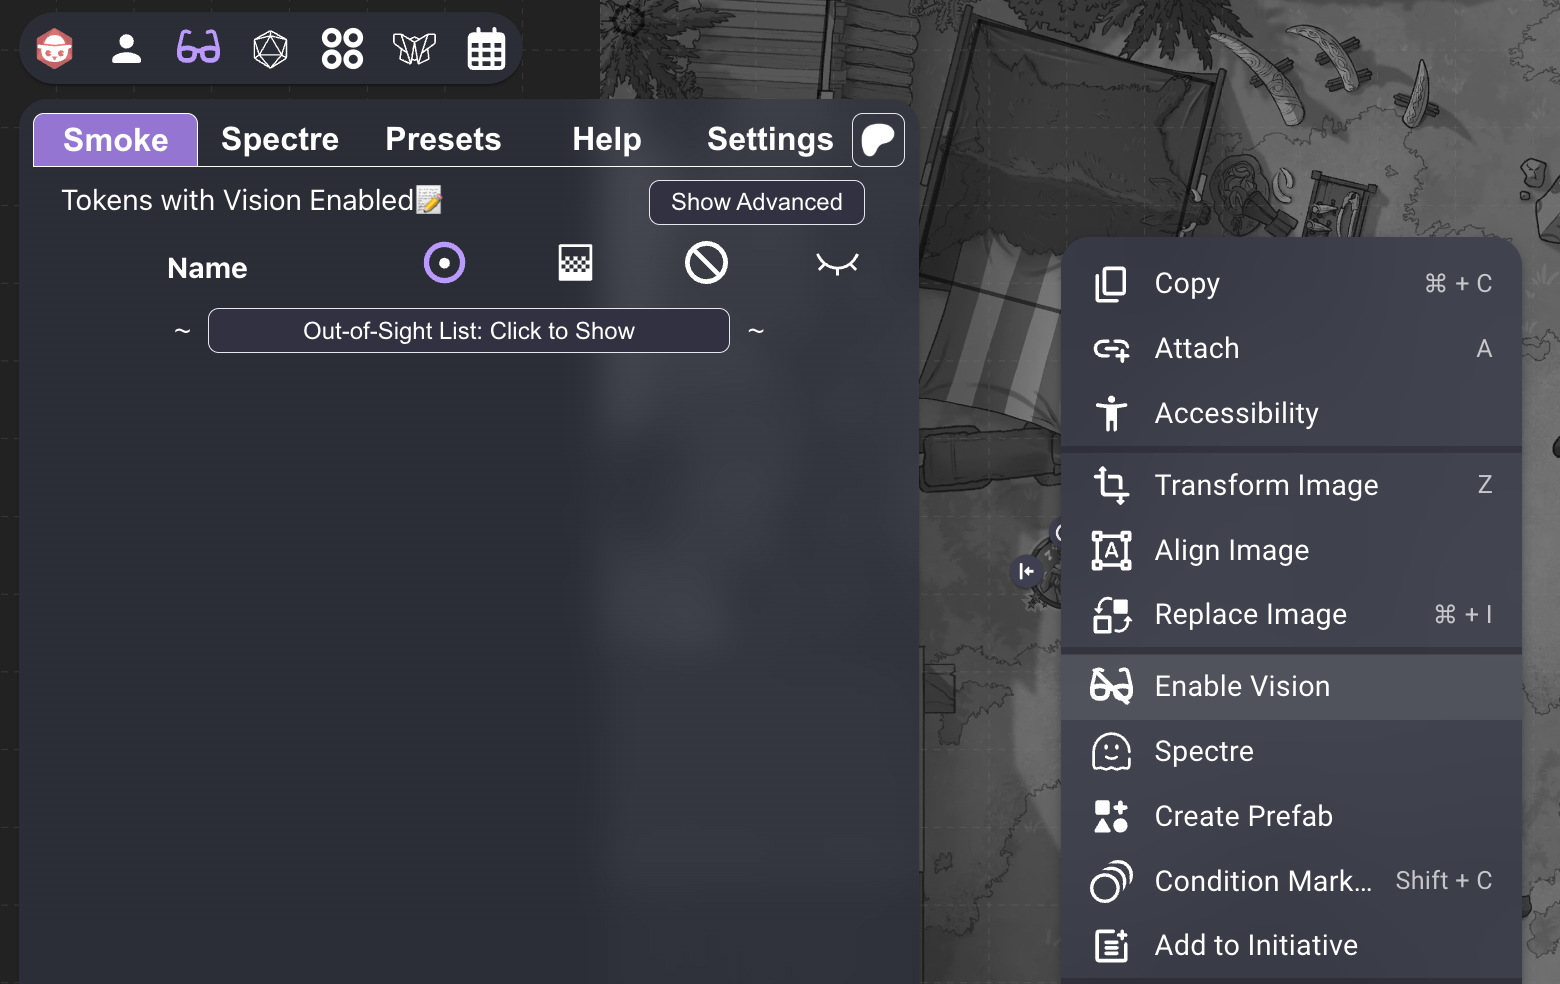
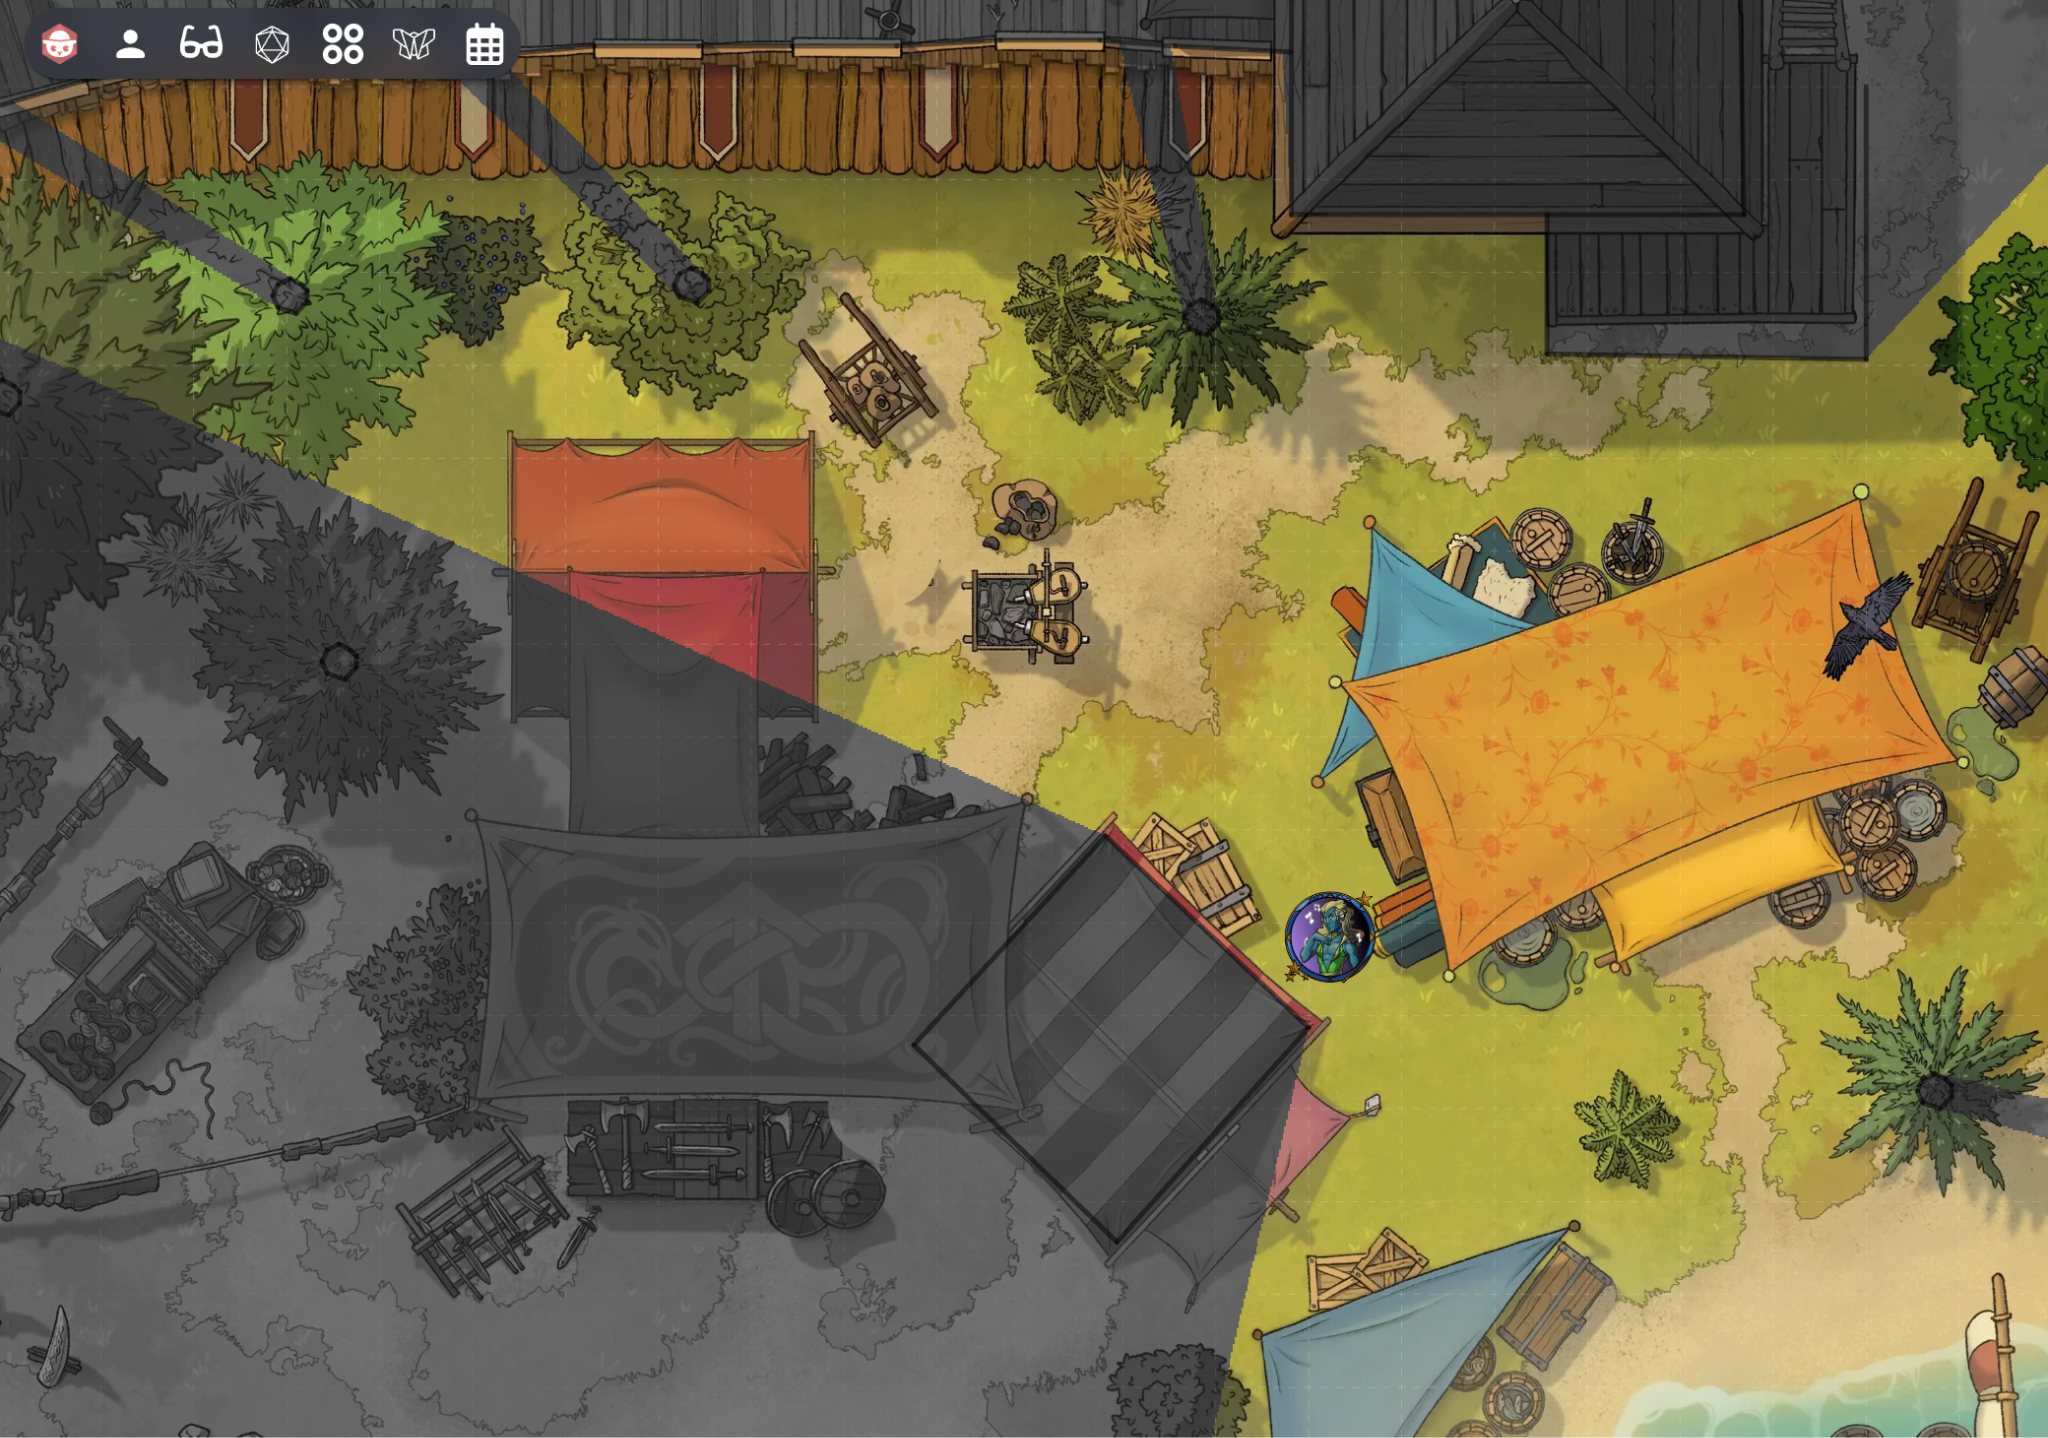
Once the map is uploaded, you’ll want to enable dynamic vision on your players’ tokens. This is what makes the walls, lighting, and fog of war built into the UVTT file visible.
- Right-click the token.
- Select “Enable Vision”.
All tokens with vision active appear in the Smoke tab of the Smoke & Spectre panel, where you can manage them during play.
And that’s it–your map is all ready to go. Happy adventuring!
Something Didn’t Work?
Head to the #VTT-discussion channel on our Discord—our community is always happy to help with any questions. You can also reach us directly at support@czepeku.com!