


Written by: Annie S.
The Underdark — a realm where darkness reigns and danger lurks around every corner. Filled with monstrous creatures, ancient cities, and powerful magic, this subterranean world is the perfect setting for introducing an alien sense of mystery and survival into any D&D campaign.
In this article, we’re going to be focusing on the Middledark, the middle layer of the Underdark. Here, your party will explore mysterious mindflayer colonies, sprawling drow manors, and eldritch underwater temples—all while navigating alien wildlife and treacherous landscapes. As such, the Middledark is ideal for mid-tier adventurers who, after getting used to the dangers of the Underdark, are now ready to face greater challenges and uncover deeper secrets.
Dividing The Depths
To cover all your bases, we’ll be breaking this series into three articles:
The Upperdark
Closest to the surface, the Upperdark serves as the entry gateway to the Underdark’s myriad dangers. This section is packed with maps perfect for initial counters with some less-hostile Underdark denizens, such as the svirfneblin, and the unique flora of the subterranean world. Check out our collection of Upperdark maps and plan your party’s introduction to the Underdark here.
The Middledark
That’s this article! Delving deeper, the Middledark presents a much more perilous environment than its upper counterpart. This layer is rich with walled cities and dark enclaves of Underdark denizens—many of whom are a little less welcoming. These Middledark maps will immerse your players in the natural hazards and formidable inhabitants of the Underdark.
The Lowerdark
In the bowels of the world, the Lowerdark is a realm of nightmarish horror and ancient secrets. Maps for this layer were chosen for their potential to create terrifying encounters with eldritch horrors and abyssal creatures. Browse through our collection of Lowerdark maps here to prepare your players for the most harrowing challenges they’ll face in their lives!
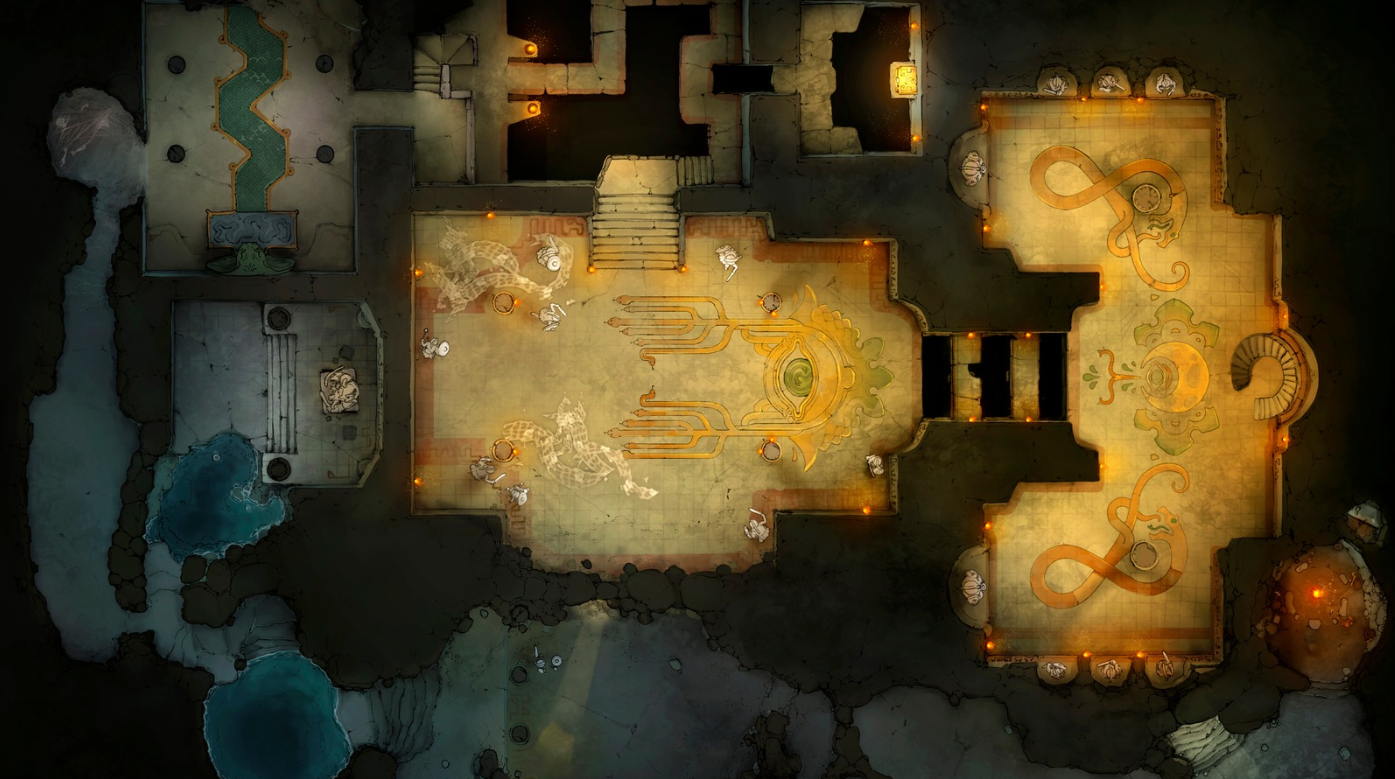
1. Gracklstugh City Center
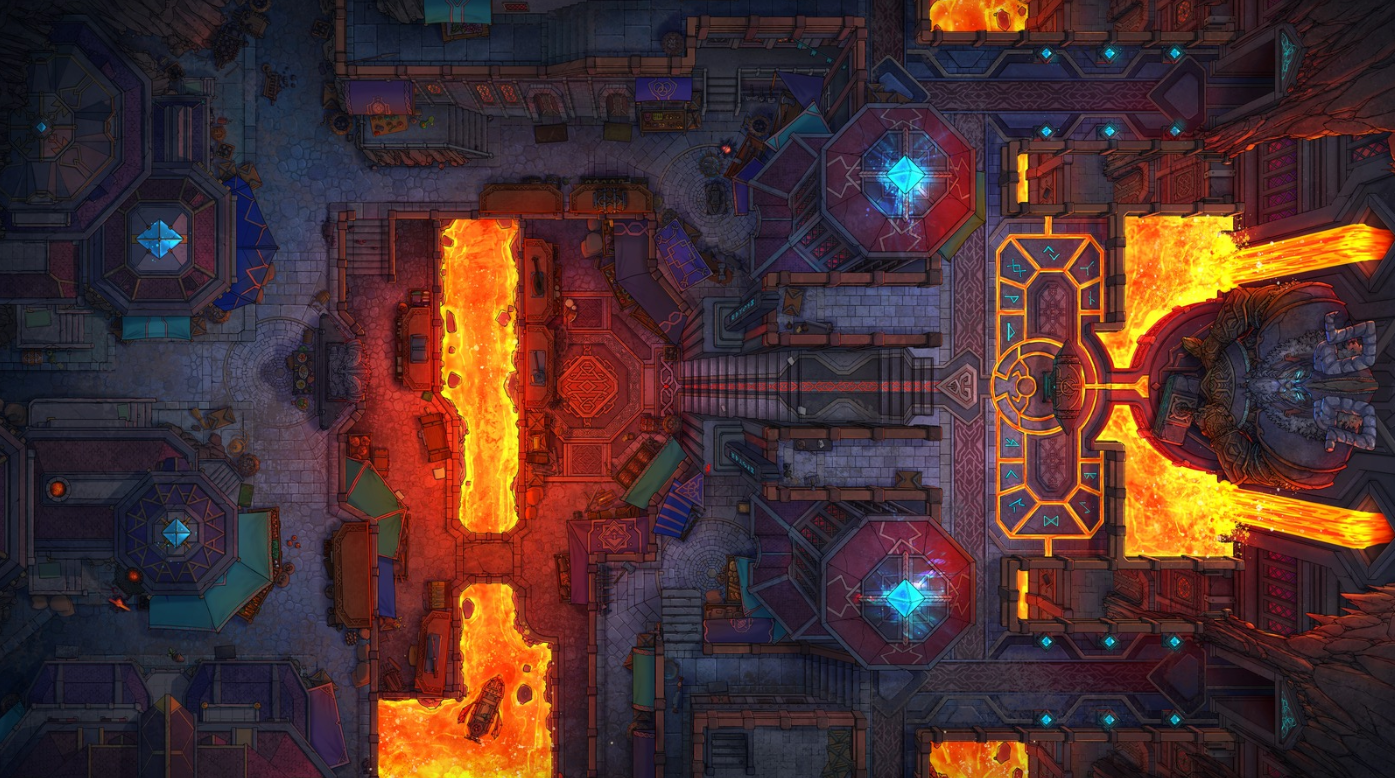
Gracklstugh, also known as the City of Blades, is a thriving duergar (gray dwarf) civilization deep in the Underdark. This Underground Dwarven City Center map serves as a vivid Gracklstugh battlemap, ripe for your players to explore.
This expansive city plaza showcases intricate dwarven architecture, with molten rivers snaking through the citiy. At its heart lies a ceremonial anvil and a prominent dwarven statue that oozes dwarven grandeur. Fireproof rowboats float on the molten lava, hinting at the innovation and resilience of the city’s inhabitants, who have found ways to thrive even in the most lightless of depths.
This map is perfect for an Underdark adventure like Out of the Abyss, plunging your players into the socio-political intrigue of the rigid duergar monarchy—while providing a backdrop for possible diplomatic missions, forging rituals, or quests from blacksmiths and craftsmen.
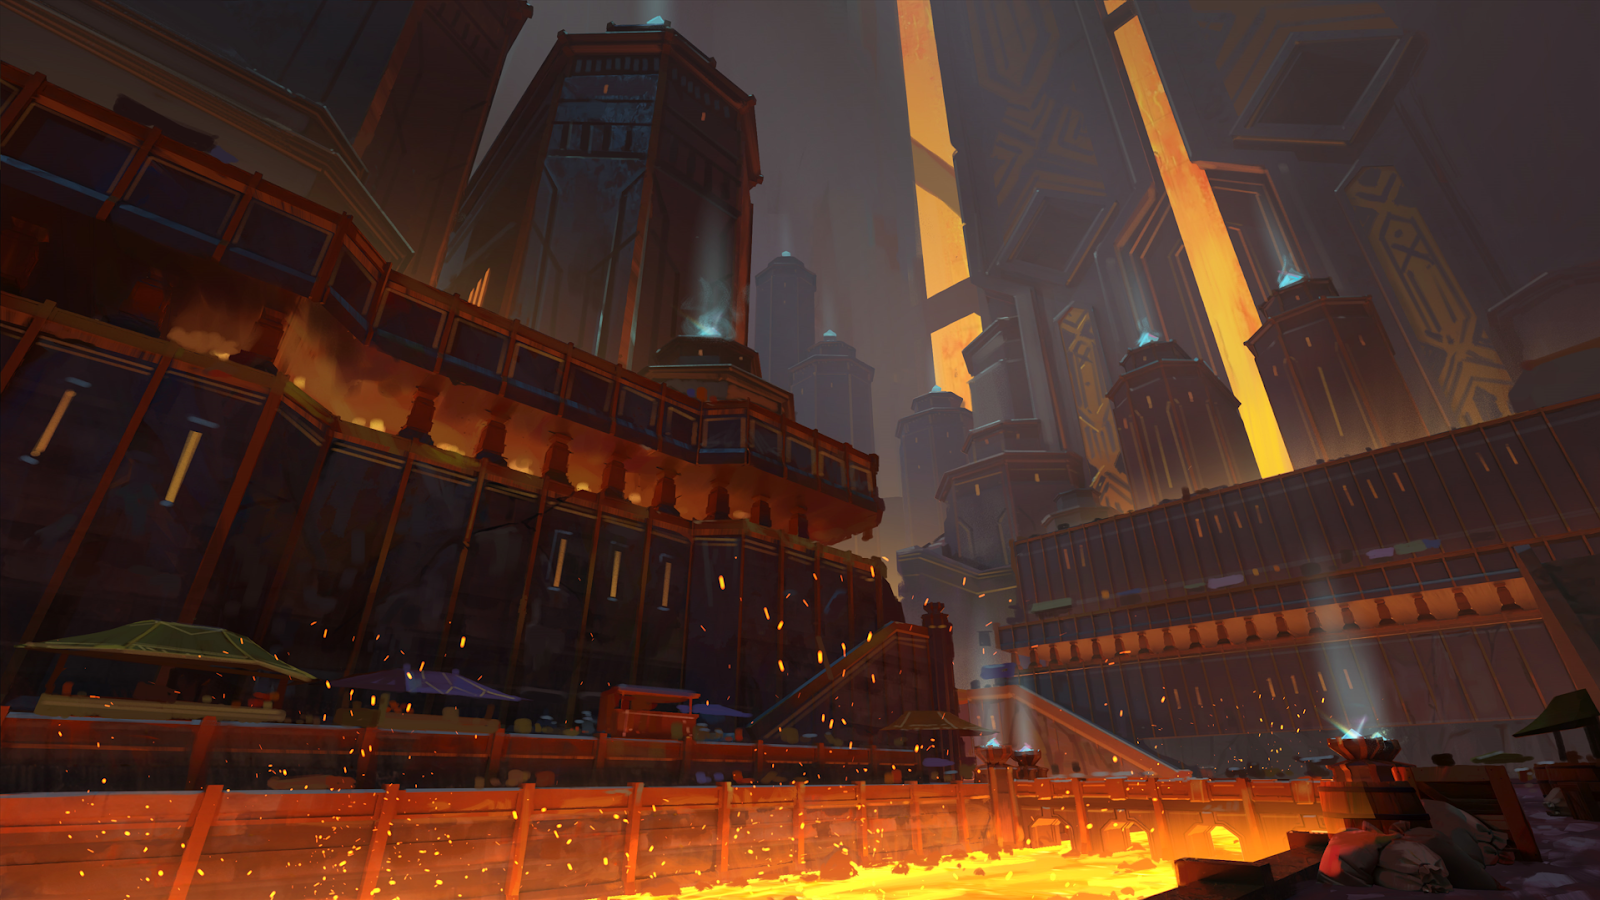
This map also includes a “Scene”—a beautifully rendered illustration, perfect for immersing your players in the magnificent dwarven cityscape and bringing your adventure to life. Take a look!
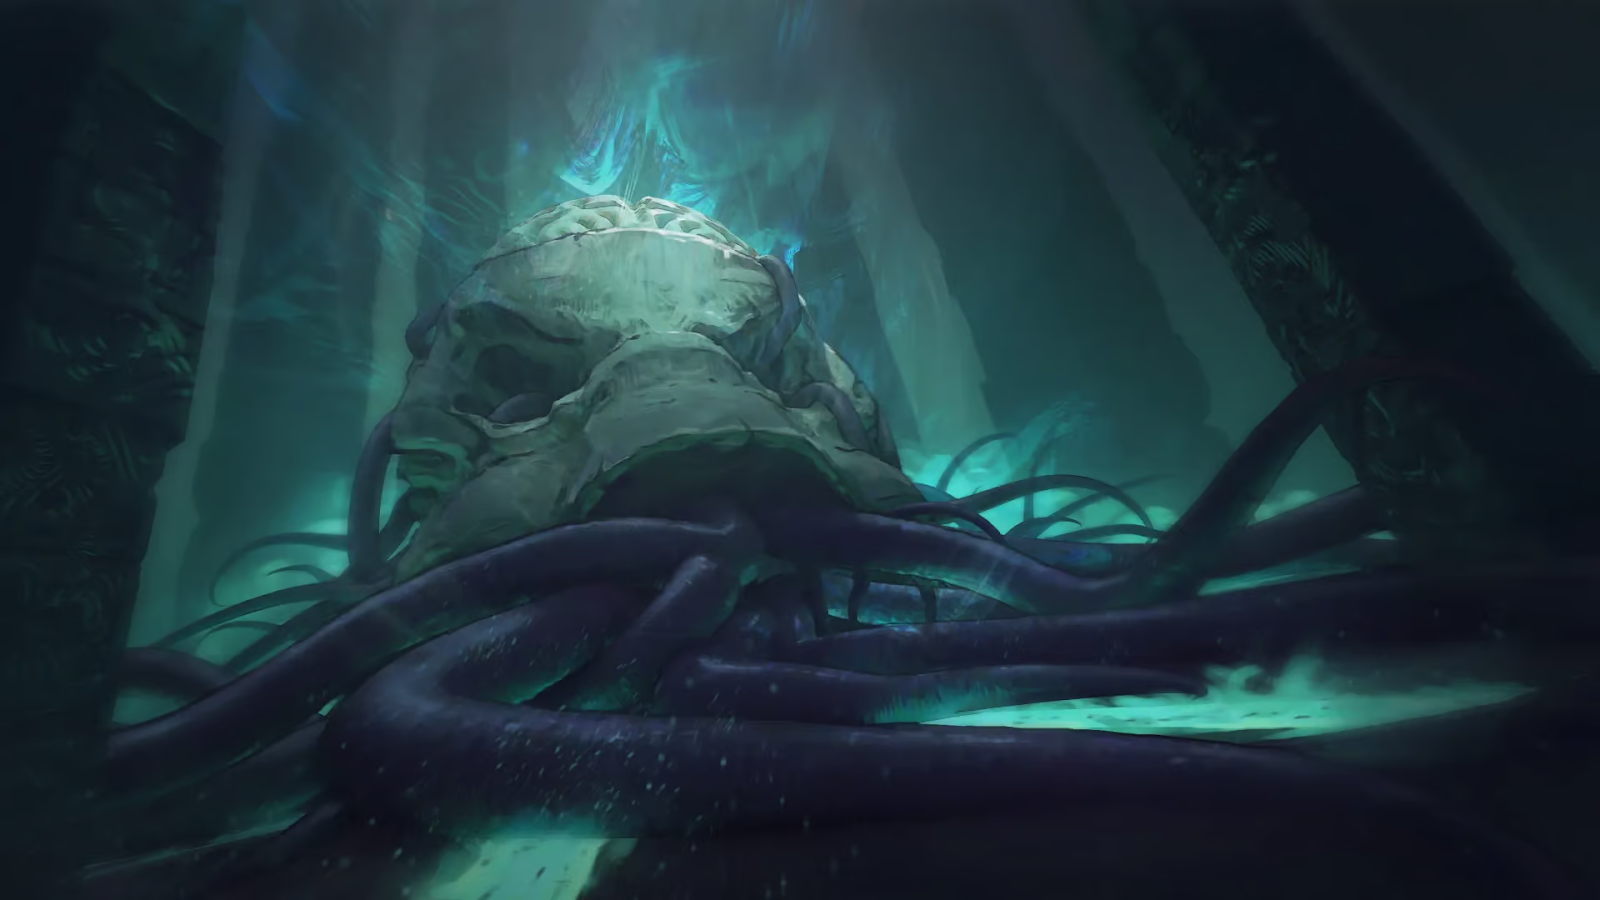
2. Mindflayer Colony - Spine Mine
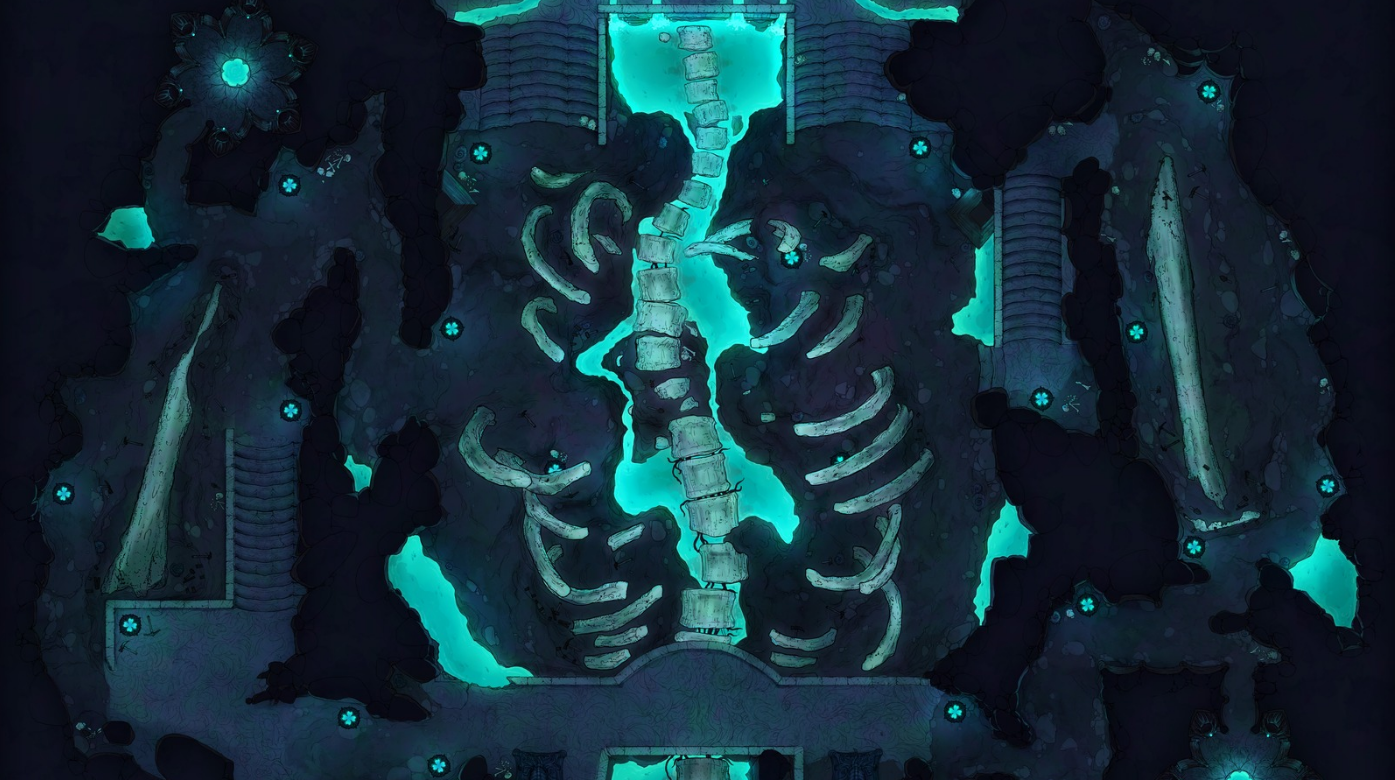
Prepare your players for a thrilling and chilling descent into a Mindflayer Colony with the Spine Mine—the first of three maps in our series of mindflayer dungeons. This map will set the tone for a spine-tingling adventure deep in the dangers of the Middledark, where your players will face off against one of D&D’s most iconic monsters.
The Spine Mine is the striking site of an ancient behemoth skeleton, now under the control of the illithids. Pathways snake through and around the colossal bones, where eerie pools of ectoplasm flow through the caverns like glowing veins. It’s difficult to overstate how both unsettling and awe-inspiring this map is!
As an introduction to a larger dungeon, this map could be used as a staging area where your players infiltrate the colony to gather intelligence against the illithids’ sinister plans. The verticality of the map provides hiding spots and vantage points, encouraging players to think creatively and utilize their surroundings to their advantage.
3. Mindflayer Colony - Sacrum Shrine
The second installment of the Mindflayer Colony map series, the Sacrum Shrine, features an intricate network of winding caverns, adorned with mindflayer machinery and technology.
The glowing ectoplasm continues to course through the cavern walls, framing a series of labyrinthine tunnels and eldritch enemy encounters that are sure to challenge even the most seasoned Underdark delvers.
This map, much more “dungeon-like” than the last, is perfect for the rising action leading up to the final boss fight—setting the stage for any tasks your players might have come here to perform, such as dismantling mindflayer technology, rescuing captives, or culling as many illithids as possible.
4. Mindflayer Colony - Elder Brain
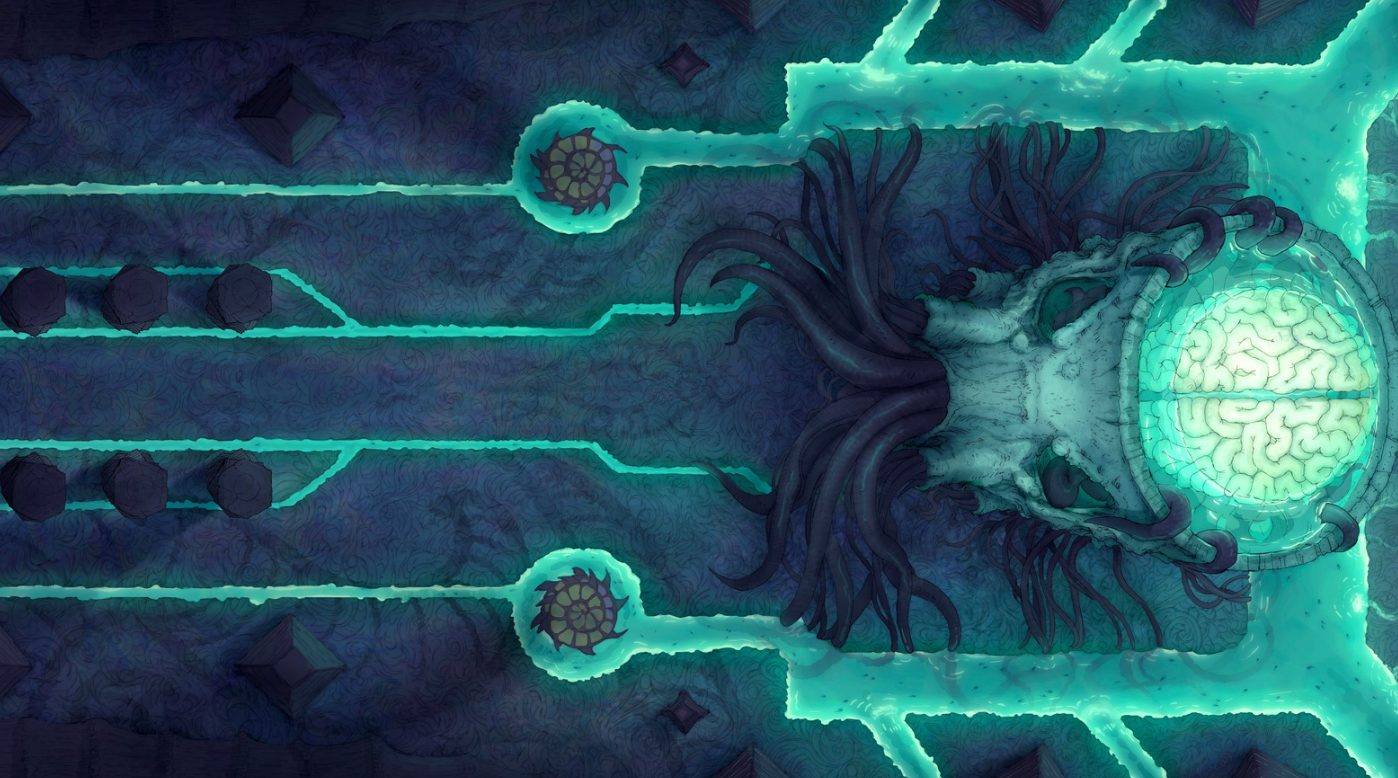
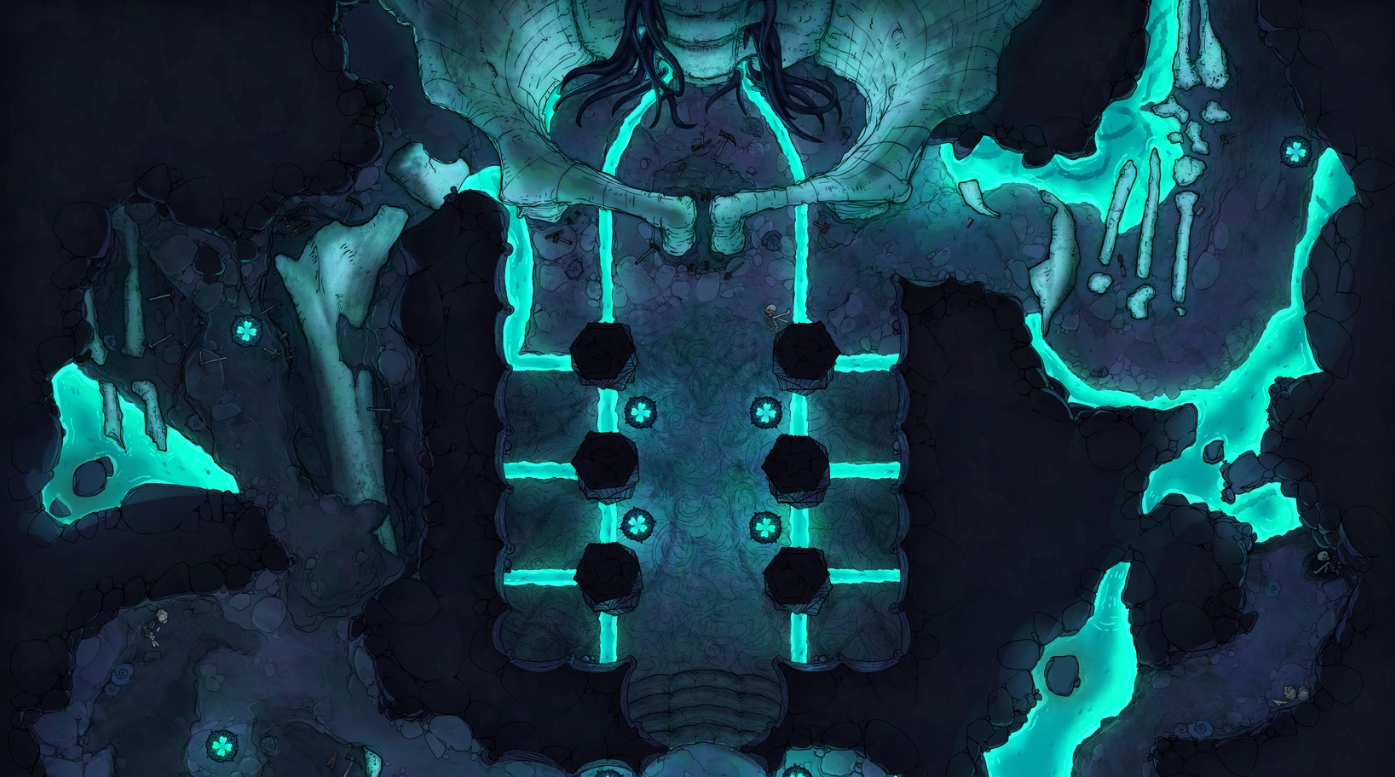
The final part of our mindflayer colony series, this Elder Brain chamber depicts a massive, awe-inspiring grand chamber where veins of ectoplasm converge into an eldritch skull that looms over the players: with a pulsating brain at its core.
This boss arena is truly a sight to behold, with its enormous skull and glowing brain casting a brilliant, eerie blue light throughout the towering cavern—the perfect setting for an epic final boss fight with an ancient aberrant creature, bound to the will of the cold, cruel illithids.
To make it a showdown to remember, consider the following mechanics to add to the fight:
- Mind Control: The Elder Brain can dominate players, turning against the party until they can break free of its influence.
- Psychic Pulses: The Elder Brain emits waves of psychic distortion that cause confusion or madness temporarily (or indefinitely, until restorative spells are cast on them).
- Lair Actions: The Elder Brain takes special actions at the turn of each round, such as summoning more minions, creating a shield (temporary hit points), or healing itself with the ectoplasm veins.
For more ideas on creating exciting boss fights, check out our “Top 10 Boss Lairs” article, where we explore a variety of boss creatures and mechanics that can be used to make your encounters much more unforgettable.
5. Stonebound Lair
Featuring a sprawling network of caverns connecting to an ornate temple, this Temple of the Medusa map is perfect for adding a touch of strategic depth to your Underdark adventures.
The dungeon itself is filled with ominous statues scattered throughout, hinting at the petrifying nature of the temple’s boss. A central shrine area, shadowy tunnels, and eerie, dark passageways that scream “beware of traps” all make for a truly atmospheric and intricate environment that builds up to the master of this lair.
The second part of this map culminates in a throne room where your party might fight a medusa, or similar creature, in their home—a fight that’s sure to demand strategy and caution if your players want to avoid becoming part of the temple’s decor.
6. Darklake Reef
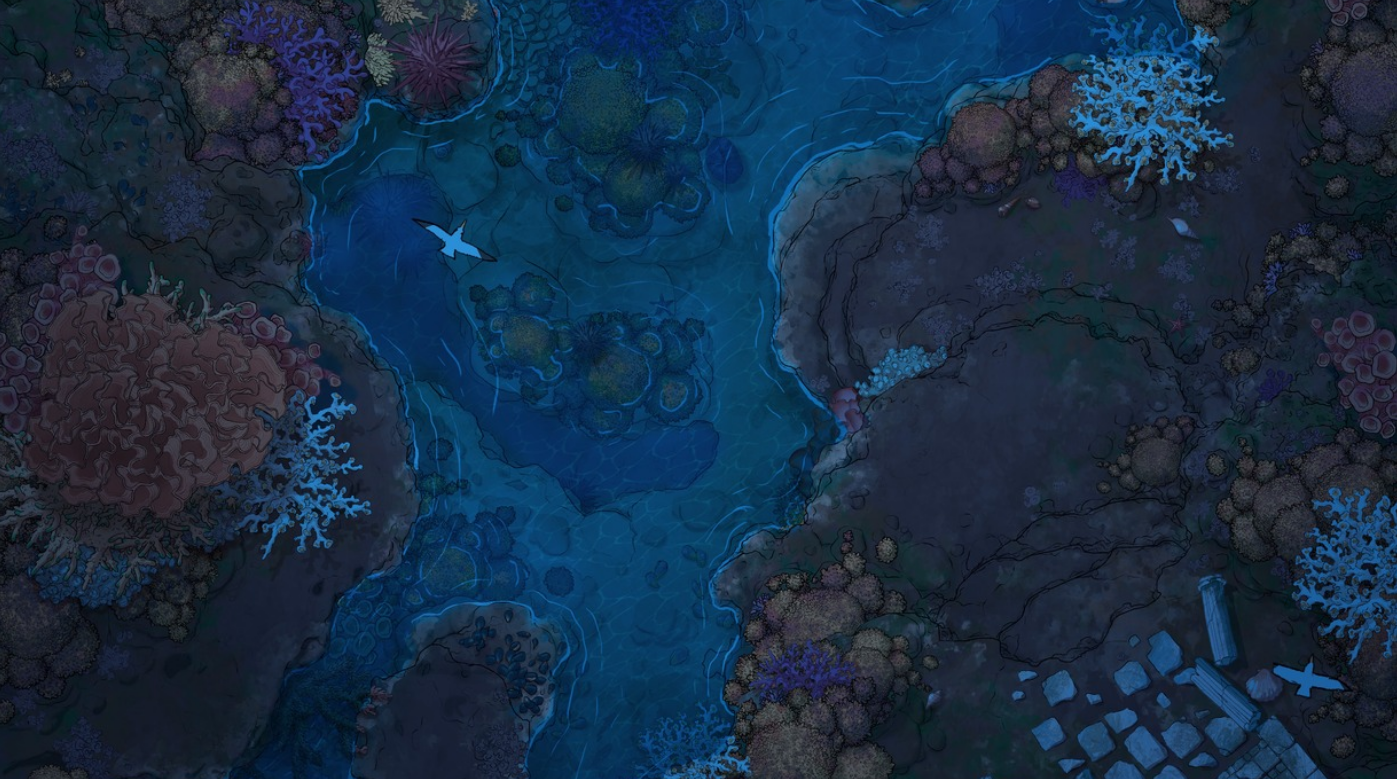
Though the original Dead Angel Reef map features a massive celestial carcass that we thought might be better suited for the Lowerdark—where extraplanar battles are rampant, this angel-free nighttime variant is perfect for when your party draws close to the treacherous, spectacular shores of the Darklake.
Adorned with bioluminescent corals and strange, beautiful aquatic flora, this reef is a kaleidoscope of vibrant colors—a rare sight in the underworld—and provides an excellent setting for any number of underwater encounters.
It could also serve as a serene stop for your players, giving them a moment of respite in an otherwise alien and unforgiving land.
7. Menzoberranyr Manor
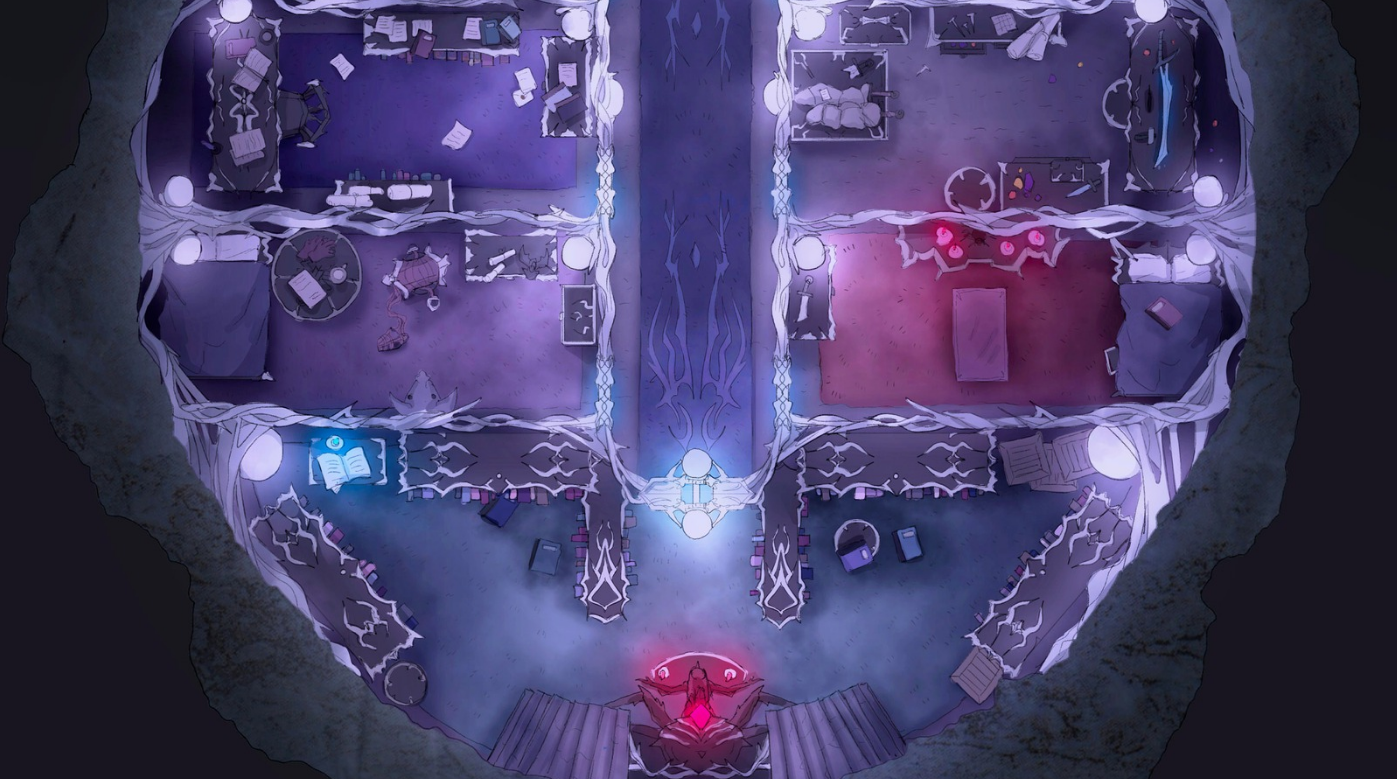
In the Underdark, all travelers inevitably stumble into the dark, twisted society of the drow: sometimes by chance, sometimes in chains. This Drow Manor is an expansive, detailed set of 12 maps designed to represent the sinister opulence of a drow noble residence.
Some highlights of the map series include a grand ballroom, a fungal and guano farm that showcases the resourcefulness of Underdark denizens, a high priestess’s chamber, and a slave prison—a stark reminder of the dark realities of drow society.
You’ll be able to easily populate these rooms with scheming nobles, brutal taskmasters, powerful priestesses, and unfortunate drow slaves, to create high-stakes intrigue, whether your players are infiltrating the manor or trying to escape it.
8. Sea Mother Temple Entrance
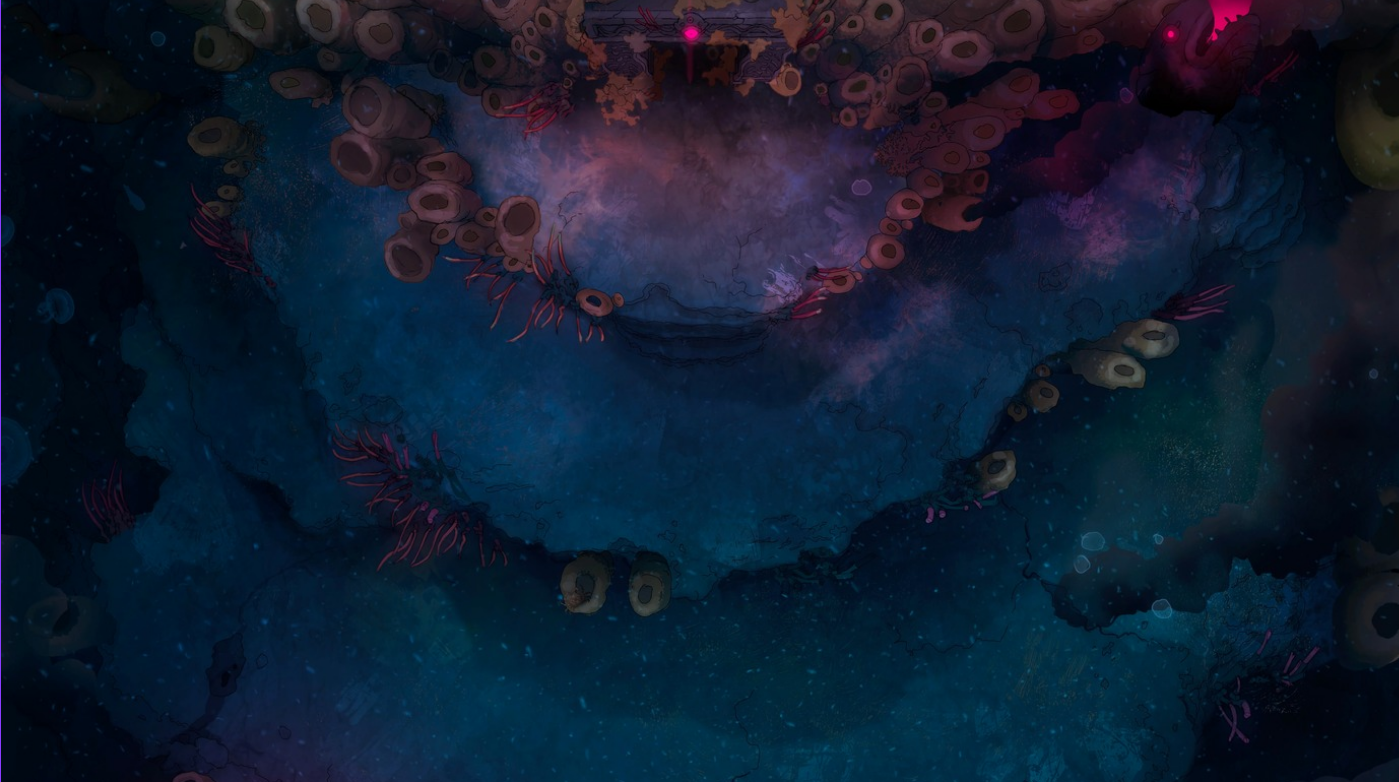
The first of another series of subterranean dungeon maps, this Deep Sea Organ — Kuo-Toa Temple map sets the stage for a chilling underwater adventure.
Complete with desiccated corals, grotesque fish heads on pikes, and ominous red glow that slices through the murky depths, this map serves as a foreboding gateway into a dark temple, while succinctly hinting at the dark rituals and strange customs of the kuo-toa, a fish-like denizen of the Underdark.
Though it’s only the entrance, the setting is sure to instill immense dread and anticipation in your players as they begin to approach. This area can also be populated by kuo-toa guards and their large guard-eels, all armed and ready to defend their sacred site.
9. Sea Mother Temple Dungeon
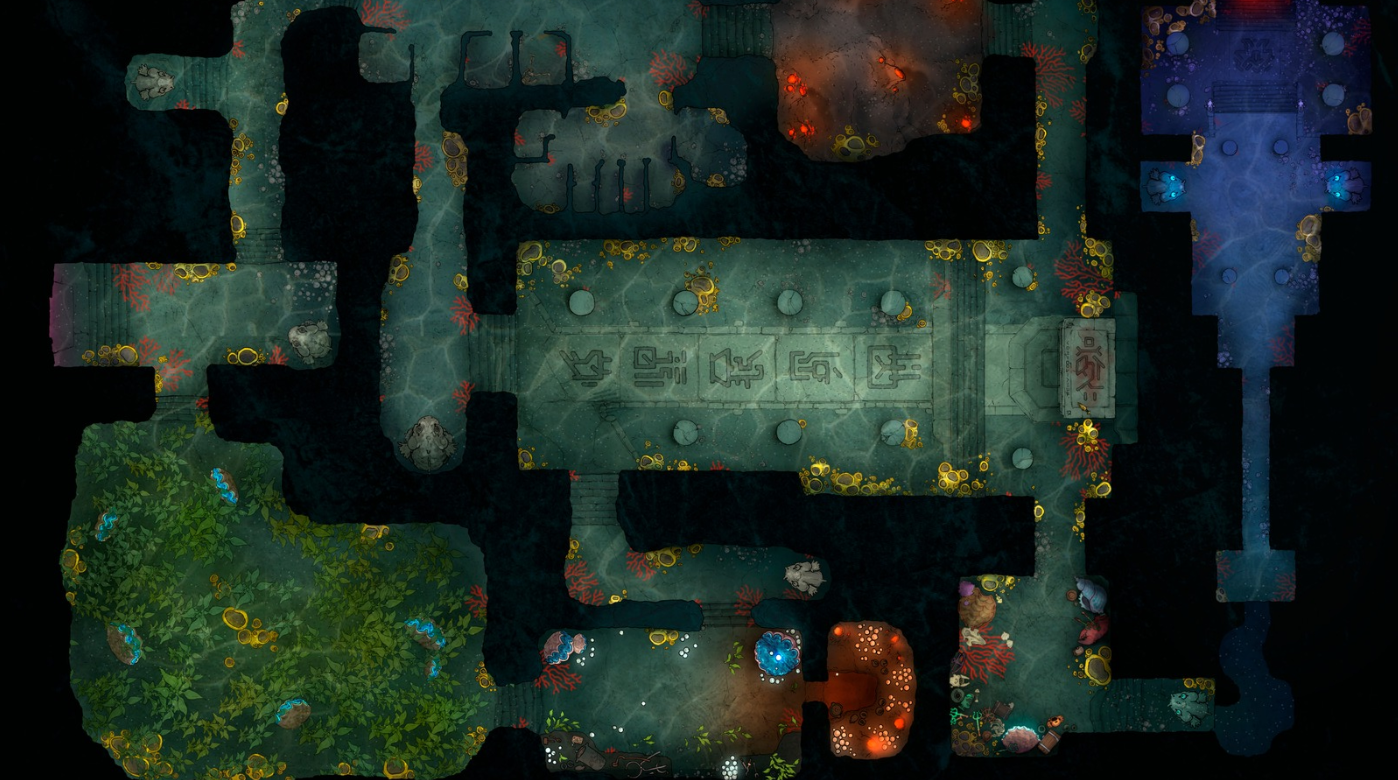
As your party delves deeper into the Sea Mother’s domain, this Deep Sea Temple map is an excellent multi-room, labyrinthian dungeon that can serve as the stage for thrilling underwater encounters.
A dense kelp forest filled with thick sea-grass provides opportunities to ambush your players, while a geothermal vent area can create unique environmental hazards that your party will have to solve without brute force.
Your players will need to conserve their energy (and oxygen) while wrangling all the unique threats of this dungeon; however, a final, ominous corridor at the end of the dungeon leads to an unsettling boss room.
10. Kuo-Toa Hatching Chamber
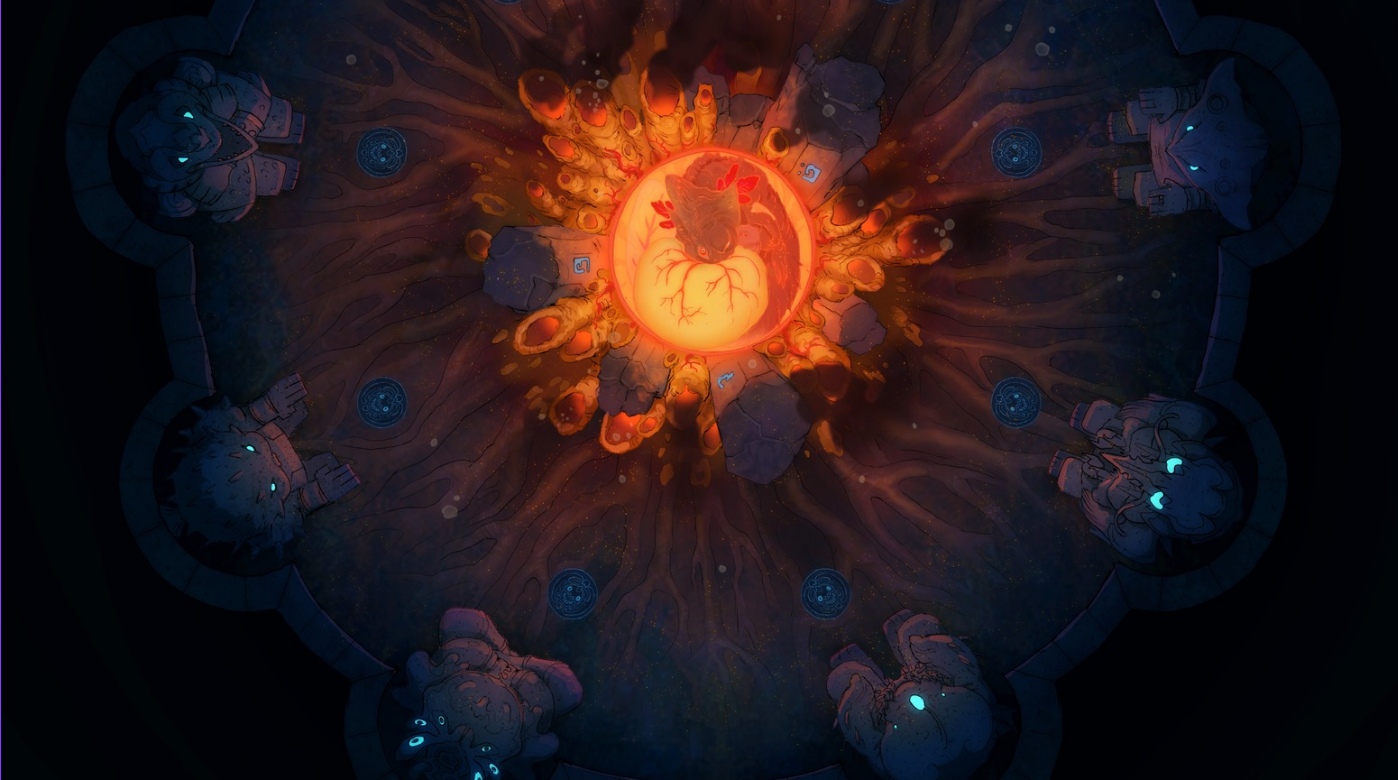
An atmospheric culmination to the series of kuo-toan temple dungeon maps, this Deep Sea Hatching Chamber is a gorgeous, foreboding boss room that your players will never forget.
This chamber is dominated by a massive, pulsating egg at its center. Surrounding the egg are ritualistic statues and fleshy veins. It should be immediately clear to any adventurers: whatever is inside cannot be allowed to escape.
An underwater lair like this provides tons of opportunity for creative mechanics and storytelling, such as recalling lore about the creature in the egg and its weaknesses, environmental puzzles involving the statues, and—of course—a good old-fashioned final boss fight as the hatchling horror inevitably emerges, ferocious and hungry.
Start Your Adventure With a FREE Asset Pack!
Keep up to date with the latest from Czepeku, sign up to our mailing list now and receive an introductory goodie bag of fantasy and sci-fi maps, scene, and tokens.