


Written by: Annie Shi
The Colossus of the Drylands campaign frame is exactly what its name sounds like: vast, dangerous, and full of forces larger than life. Between vast deserts and ancient powers, everything feels like it could be swallowed by the sands at any moment.
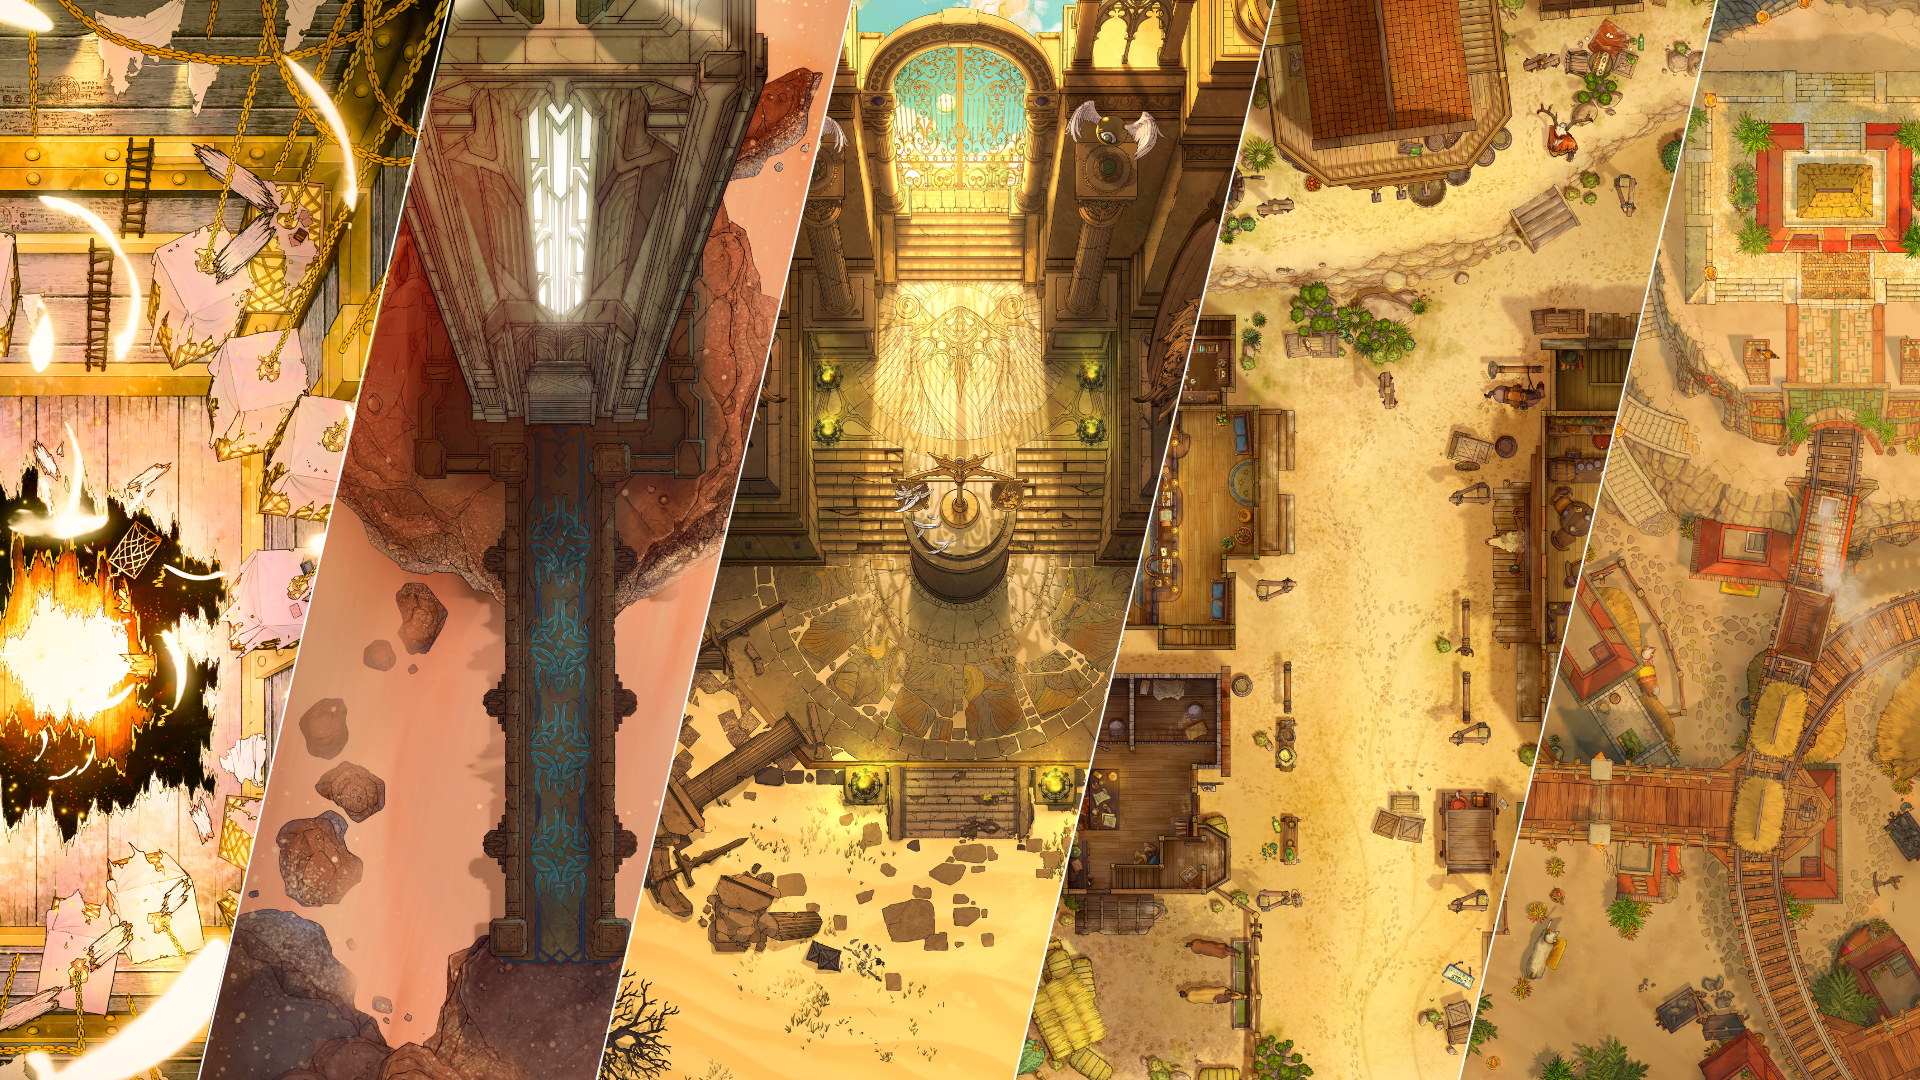
The right battlemaps matter so much in this frame, because you want your players to feel the scale, the isolation, the awe, and the danger. The following ten maps pair beautifully with the kinds of locations that the Drylands supports—from frontier towns and industrial settlements to ancient monuments and ominous relics buried in the sand.
1. Frontier Settlement — Wild West Town
The Drylands support several small frontier settlements. and this Wild West Town captures that tone instantly with its cacti-lined streets, a saloon, general store, small inn, and scattered wooden buildings sitting stubbornly against the sandy backdrop.
This makes for a fantastic recurring hub. Your party can assist the sheriff with bounties, resupply before heading back into the wastes, or sit in the heat and listen to the rumors roll in. This pack also includes transparent rooftop and room PNGs, making it especially easy to run on VTTs and letting you jump between street-level tensions and interior scenes without missing a beat.
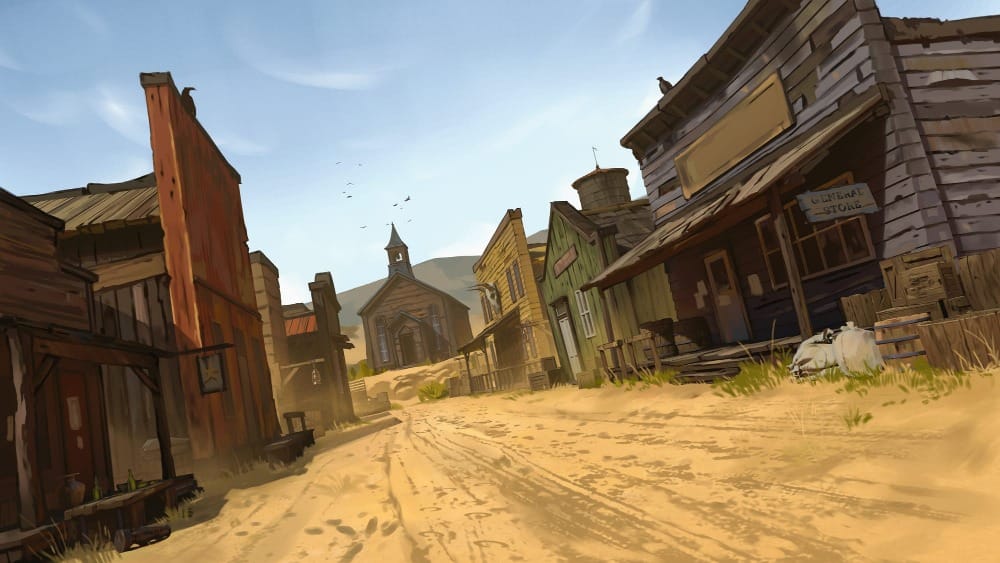
This map also comes with a hand-illustrated scene that’s perfect for immersing players in the sun-bleached atmosphere and reminding them what is at stake if the Drylands doesn’t survive.
2. Frontier Settlement — Wild West Saloon
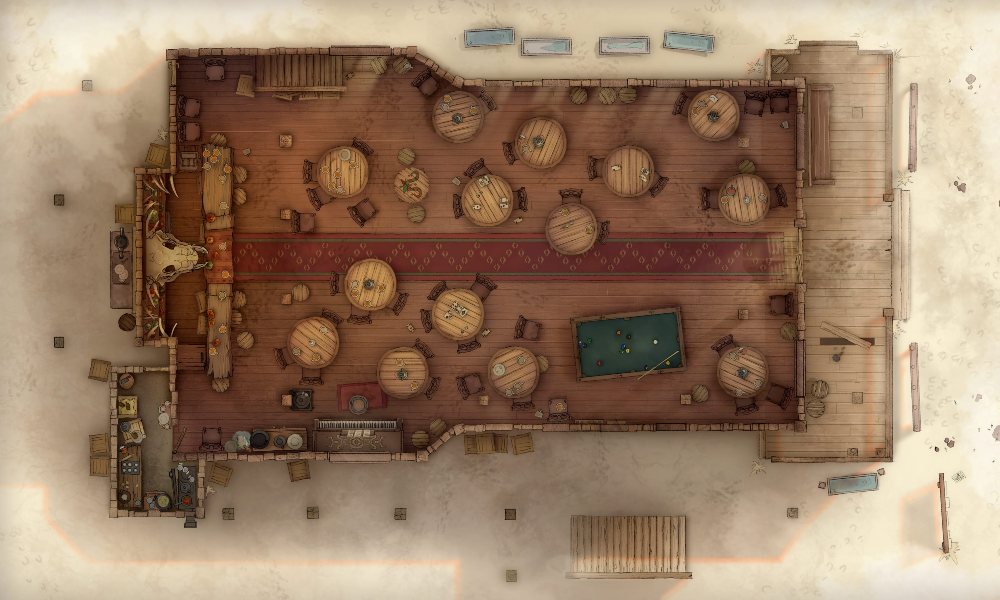
Every frontier town needs a place where tensions simmer, deals are struck, and stories get blown way out of proportion; and this Wild West Saloon delivers exactly that. A sprawling multi-floor establishment rises against pale desert sand, with a dusty taproom packed with tables, pool tables, and even a giant mounted skull that practically begs for a wild backstory.
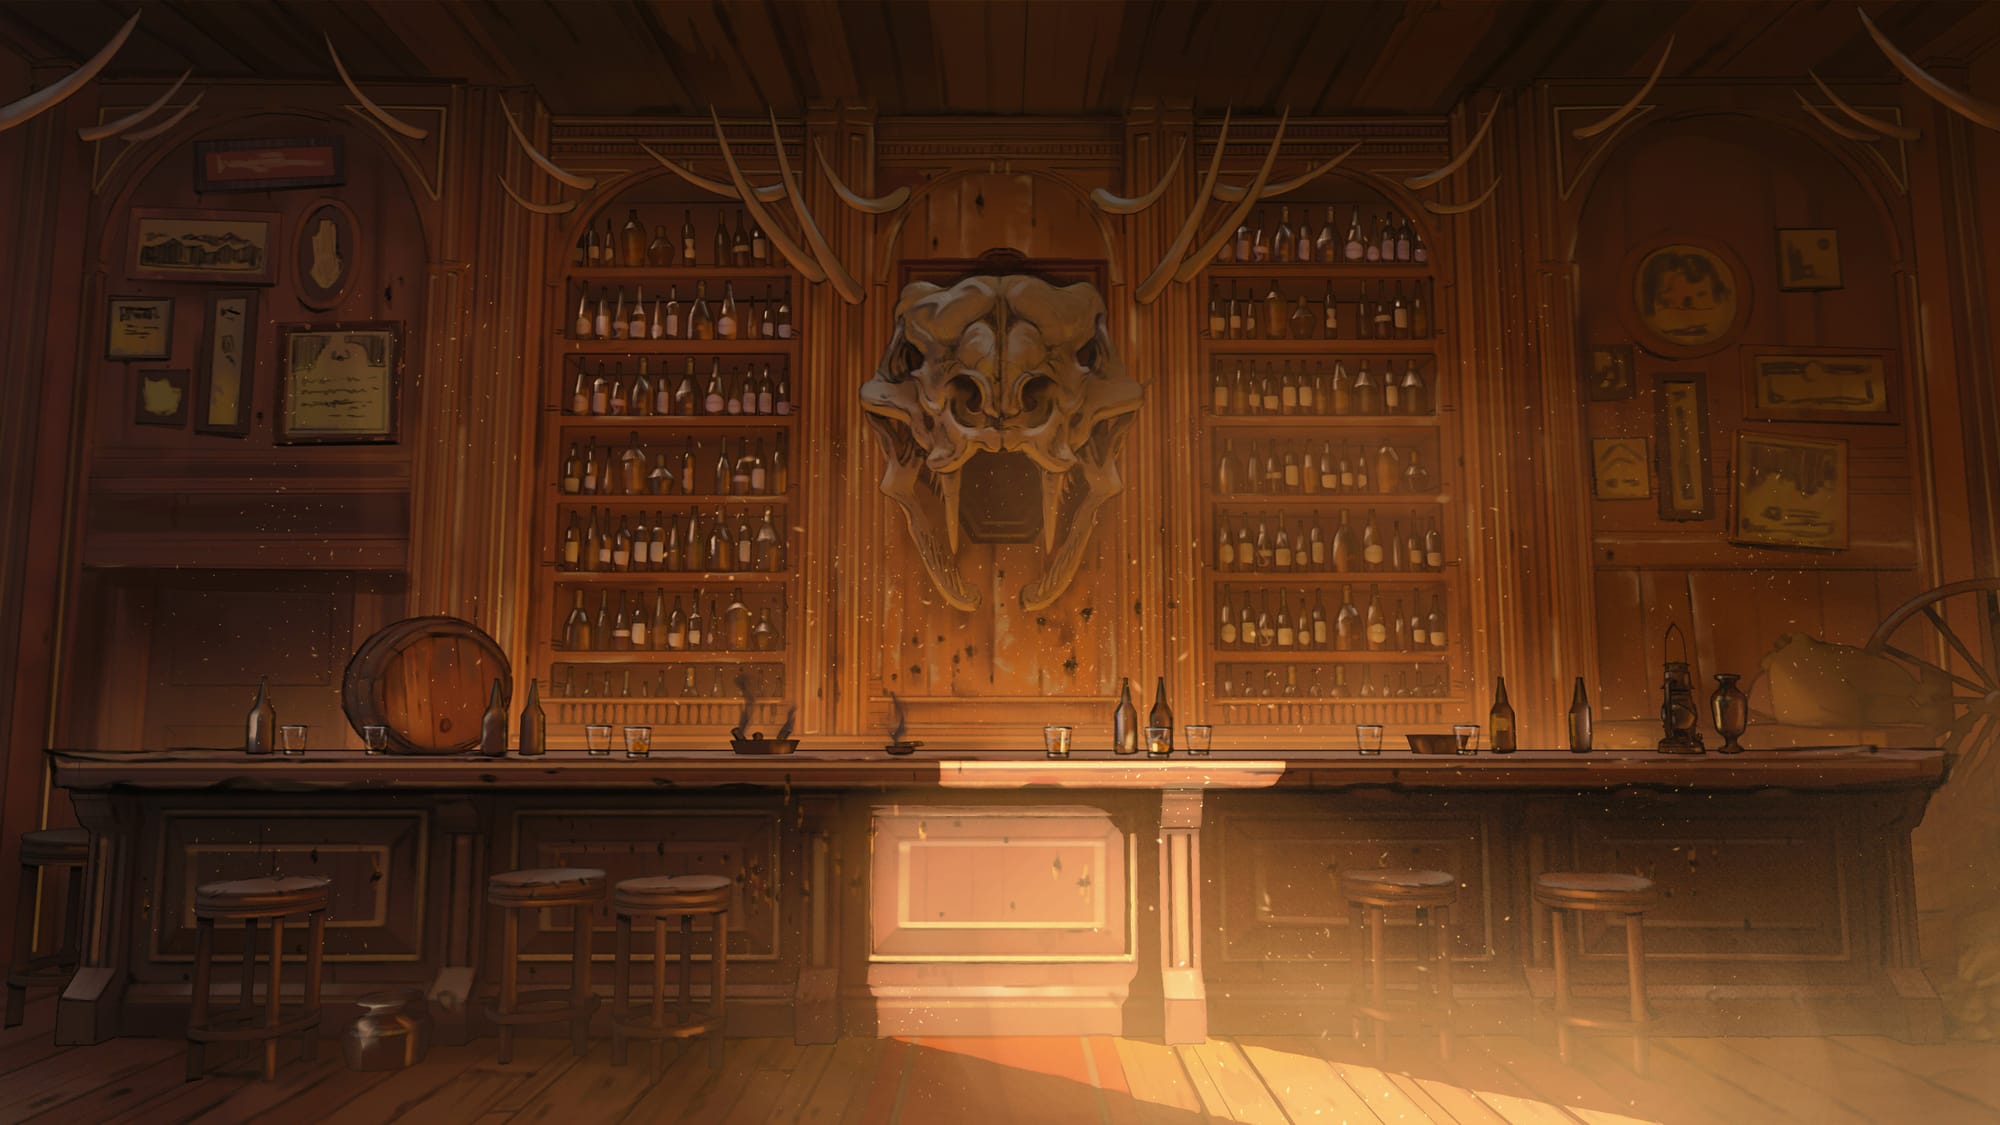
The multi-layered layout of this saloon is excellent for some juicy social intrigue. It also comes with a hand-illustrated scene for an immediate player-facing visual that gives the saloon a sense of atmosphere even before anything happens.
3. Wyllin’s Gulch — Royal Mine Town (Desert)
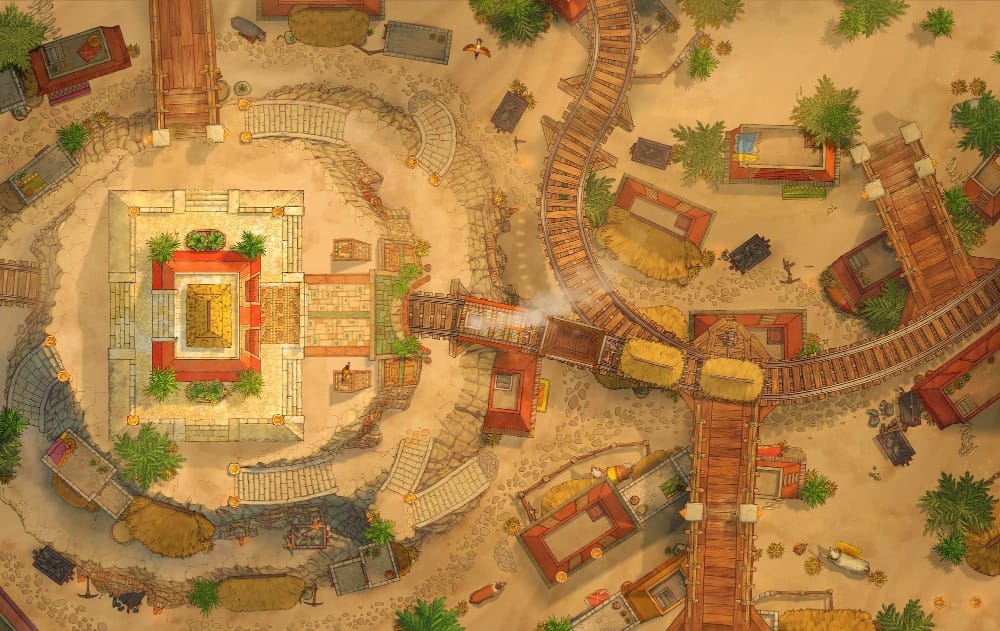
Wyllin’s Gulch is an Essentia mining town in the Dryland’s campaign frame where Kudamat has begun to rise. The desert variant of the Royal Mine Town map is a brilliant visual stand-in: a bustling industrial settlement pressed up against an ore-rich mountain, threaded with winding minecart tracks and layered platforms.
This map feels like a place constantly in motion, and is great as a backdrop for investigations into the rise of the colossi, or labor disputes and sabotage among the workers. Every corner of this settlement suggests that something valuable lies beneath—and that digging too far always carries consequences.
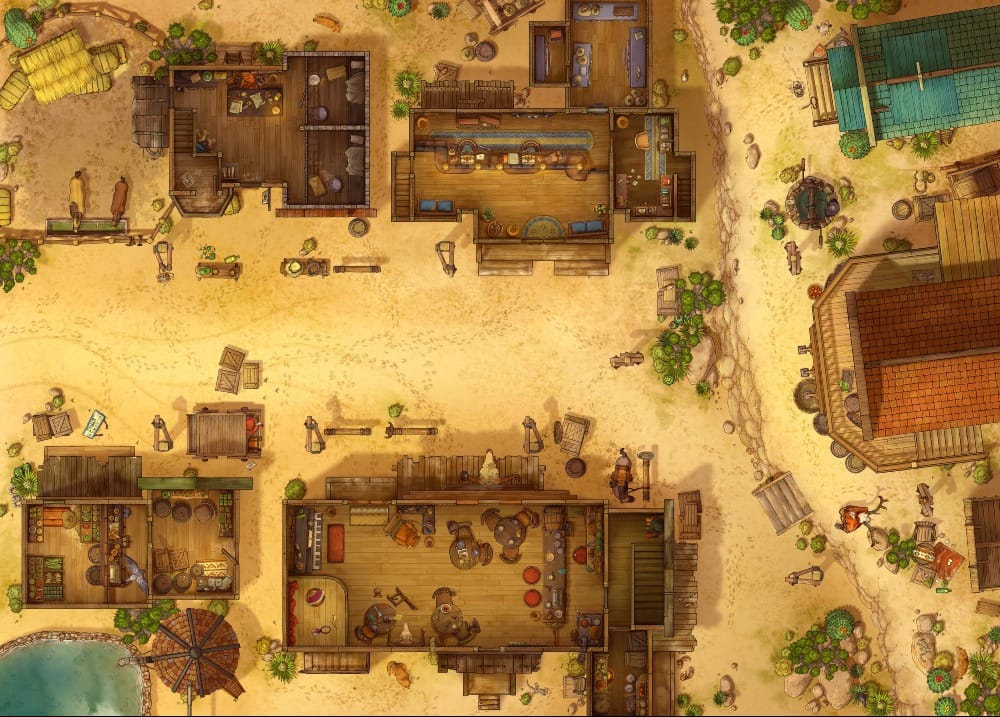
4. Havalaugh — Cloud Forest Camp (Desert)
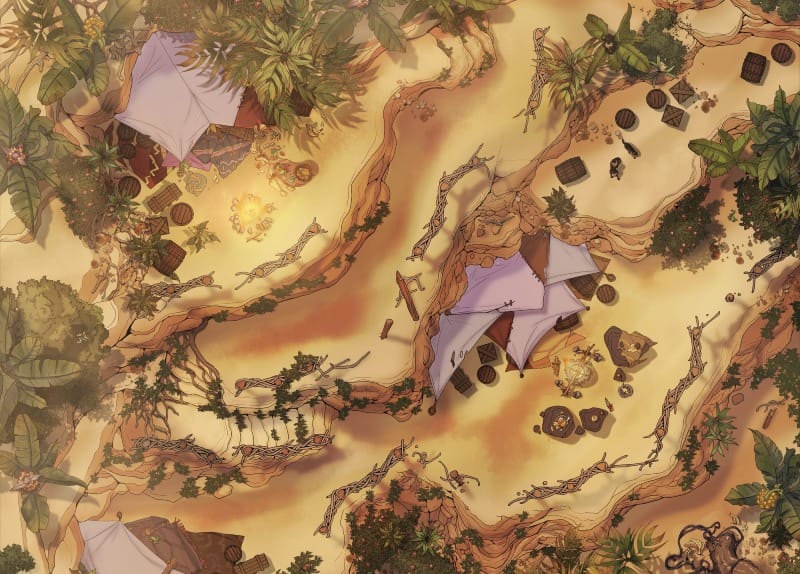
Havalaugh is a mile-long tent settlement, known for its welcoming attitude, thriving marketplace, and wildly popular High Summer Festival—all without a single permanent building in sight. The desert variant of this Cloud Forest Camp map works beautifully to capture this sprawling encampment.
Canvas tents stretch across sandy terrain, and it's easy to imagine merchants calling out their wares, and the settlement expanding outward as the crowds roll in. Perfect as the starting point for single-session quests or the much-dreaded (or loved?) shopping episode.
5. Ancient Structure — Chthonic Lighthouse (Desert)
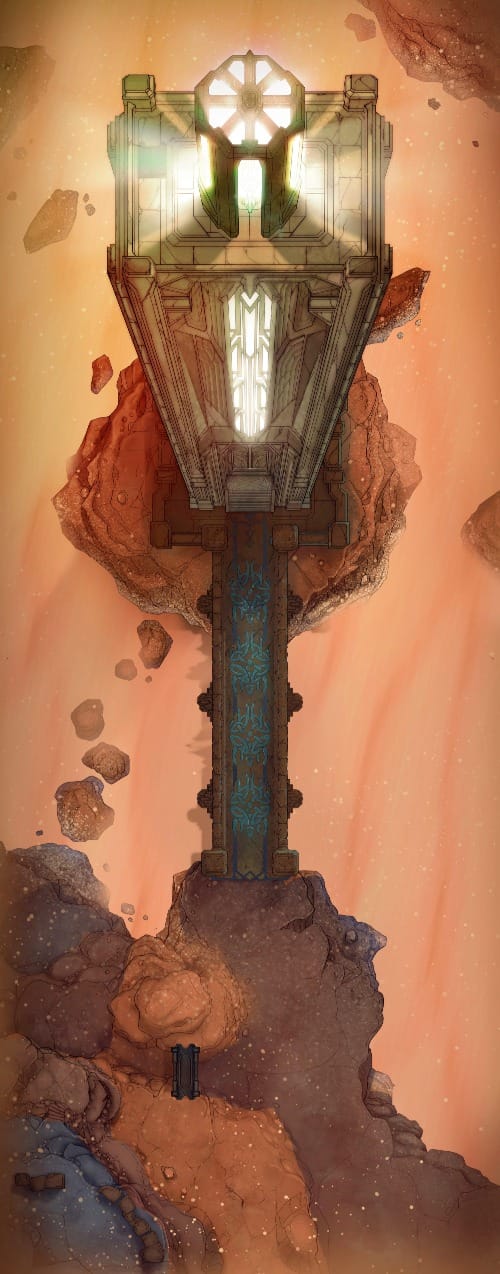
In a land shaped by forces beyond mortal scale, ancient and unknowable structures feel right at home. This Chthonic Lighthouse rises tall and imposing from the sands, perched on stone and blasting light across the dunes.
What does it watch? What is it waiting for? The campaign frame leaves room for you to decide. Perhaps it once signaled warnings against the colossi; perhaps it still does. The included interior map also makes it more than a backdrop—your players can climb it, explore its chambers, and uncover whatever remains inside.
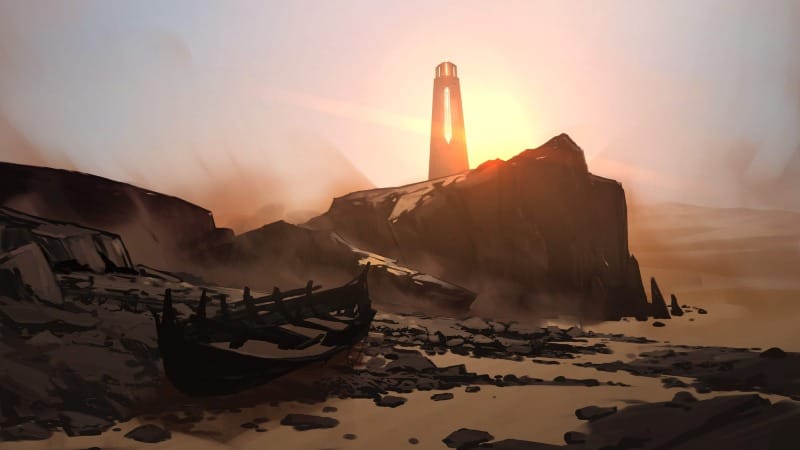
This map also comes with several hand-illustrated scenes that add to the scale and eeriness of the area, making the structure feel monumental and deeply out of place in the desert.
6. Ancient Structure — Dracolich Lair (Desert)
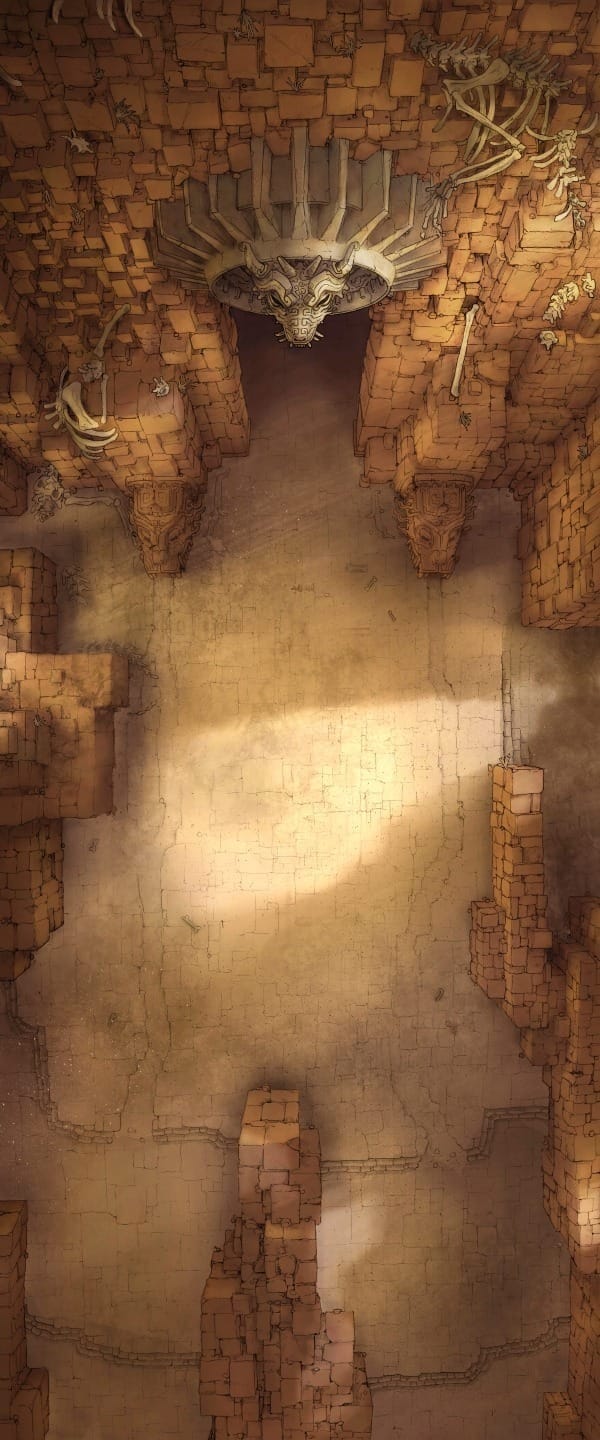
The Drylands are far from empty, layered as they are with remnants of ancient power. This Dracolich Lair map is a reminder of that, immediately communicating danger through a massive sandstone entrance framed by carved dragon heads and scattered bones.
Is this creature tied to the recent disturbances in the land? Was this temple built to contain it—or to worship it? The sandstorm and dune variants of this map can also make the approach more hazardous and cinematic, turning the journey itself into part of the threat of a mighty confrontation.
7. Desert Outpost — Dragonslands Fort (No Lava)
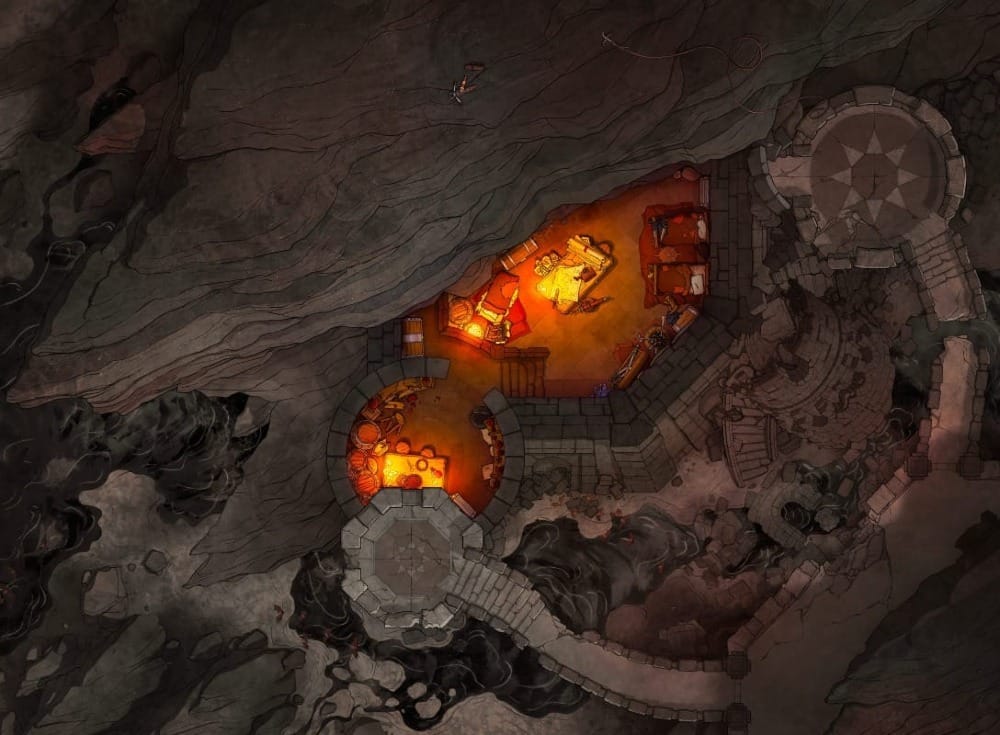
In a setting like the Drylands, outposts must be aplenty in the wilderness as footholds for authority, or to watch over trade routes. This Dragonlands Fort map, a fortified camp carved into a grey, imposing cliff with a functional interior, is perfect for that role.
Your party might be hired to reinforce it, infiltrate it, or defend it. With biome variants that include blazing lava and other environmental hazards, you can also visually represent the escalating instability of the land as more colossi begin to stir.
8. Colossi Structure — Gate of Angels (Desert)
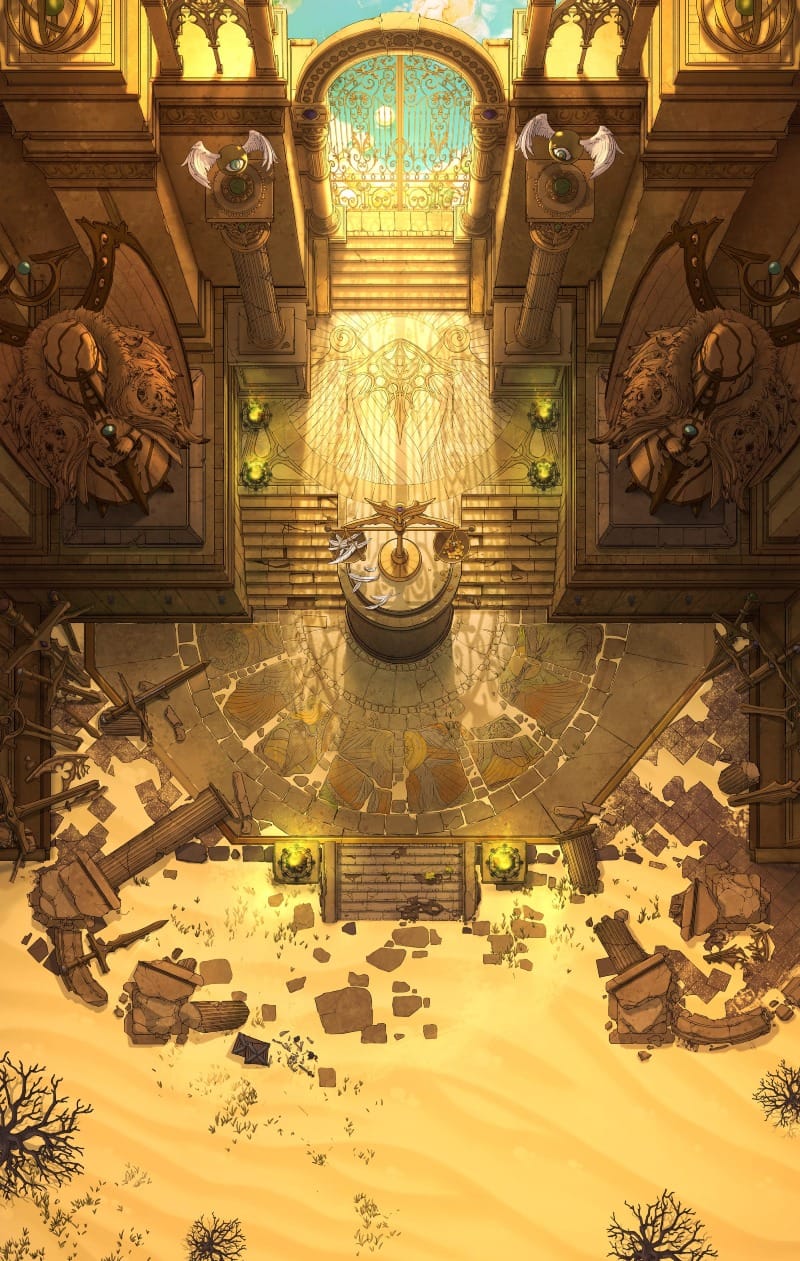
This Gate of Angels map is a spectacle. A massive golden gate rises from the sand, guarded by ominous statues and framed with golden staircases. It looks deliberate, and entirely out of place in the middle of the wilderness.
This is a perfect location for a prophecy or ritual—for some moment where the party crosses a threshold with stakes far bigger than themselves. The scale and majesty of this map reinforce the campaign’s core theme: mortals standing against something vast, old, and powerful.
9. Colossi Structure— Giant Ancient Sundial (Desert)
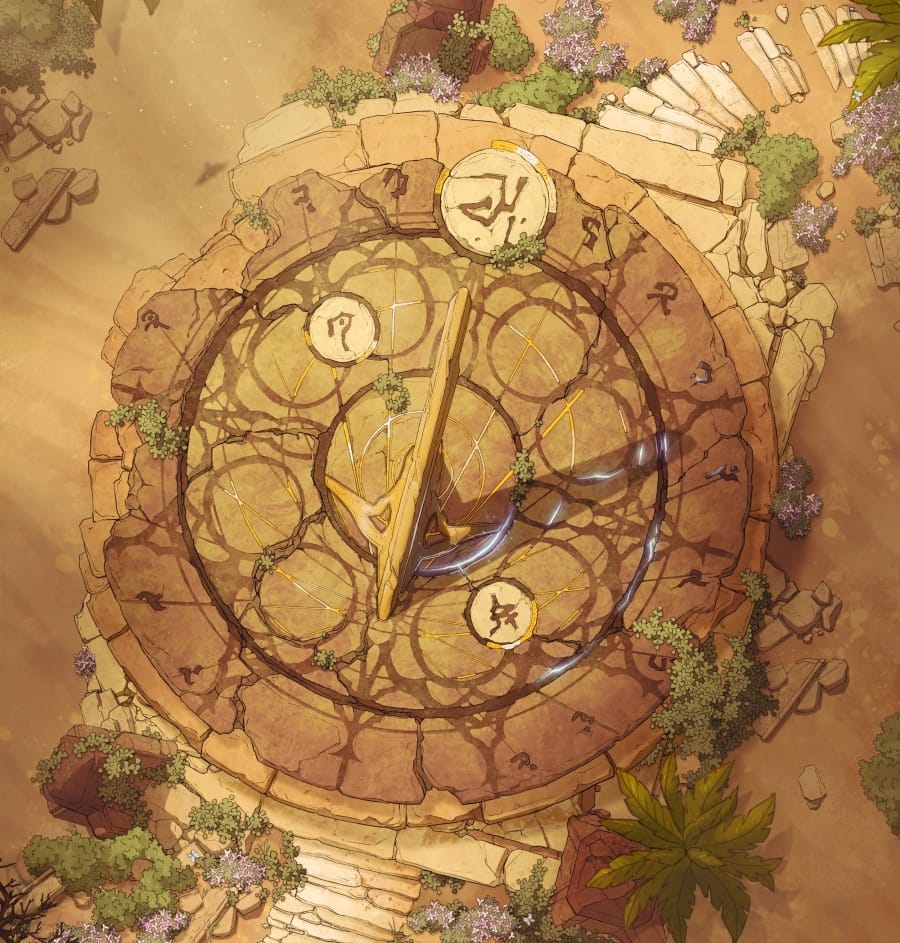
A cracked Giant Ancient Sundial sits half-buried in the sand, covered in strange symbols and surrounded by the ruins of sandstone stairs. It feels like a remnant of an earlier age—a system that once tracked something important and may yet still.
This map is fantastic for stretching your creative GM muscles. Does it measure time? Celestial cycles? Movements tied to the colossal forces shaping the Drylands? Even if your players never fully decode it, this sundial works beautifully as a memorable landmark or puzzle site where your players can start connecting patterns across the Drylands.
10. Colossi Structure — Wizard Prison Pt 7 (Angelic)
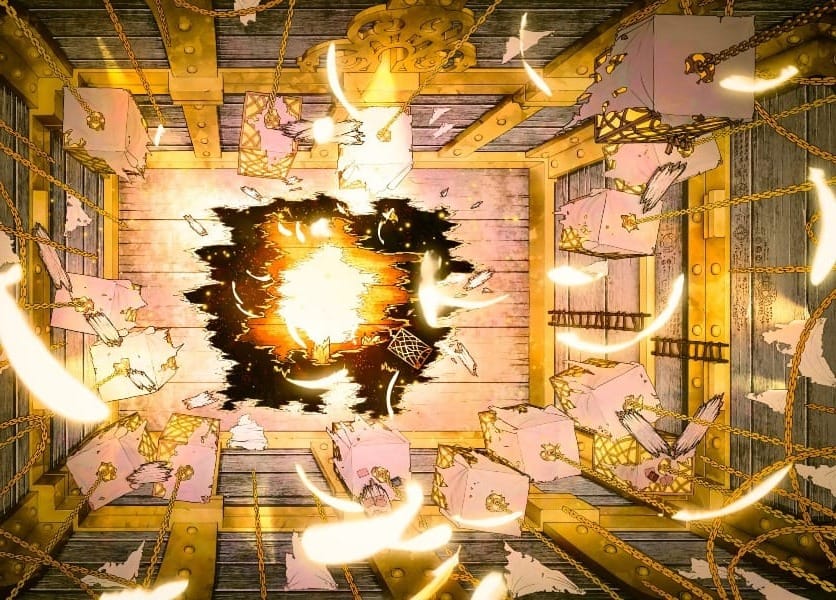
For something truly dramatic, this Wizard Prison map brings a celestial scale to the table. Radiant architecture, towering chains, and the sense of long-sealed power make this map fantastic for a climactic confrontation with something ancient breaking free—perhaps Kudamat itself.
Whatever ancient thing this cage once held, this map feels like the perfect capstone for a long Drylands campaign, reinforcing the frame’s biggest theme: immense power that mortals struggle hard to understand, and even harder to contain.
If you’re looking to flesh out even more corners of your Drylands campaign, Czepeku’s map library includes over 12,000 hand-drawn fantasy and sci-fi battlemaps, with weather, seasonal, and biome variants for nearly every setting imaginable.
From sun-scorched deserts and desolate wastelands to thriving cities and crumbling ruins, many maps also feature beautifully illustrated scenes to help you immerse your players instantly. Whether you’re running Daggerheart, D&D, Pathfinder, or another TTRPG for your table, it’s easy to find the perfect space to bring your next session to life.
Start Your Adventure With a FREE Asset Pack!
Keep up to date with the latest from Czepeku, sign up to our mailing list now and receive an introductory goodie bag of fantasy and sci-fi maps, scene, and tokens.